Follow
  • Facebook
  • Pinterest
  • Instagram
  • Youtube
Sew This Pattern – Online sewing shop
  • STP Sewing Patterns
    • STP Sewing Patterns
    • Sizing Chart
  • Indie Designer Printed Patterns
    • Tilly & The Buttons
    • Closet Core Patterns
    • Paper Cut Patterns
    • Sew Over It
    • Style Arc
  • Fabrics & Notions
    • Cottons / Linens and Blends
    • Georgette
    • Woolens
    • Labels
    • Needles
    • Zippers
    • Interfacings
    • Miscellaneous
  • Sewing School
    • Sewing School
    • Cancellations Policy
    • Sewing School Instructors
    • Sewing School Mailing list
  • Blog by Nine Stitches
  • MENU
  • 0

Recycled Pillowcase Halloween Treat Bags

September 25, 2013

It’s only been the last few years where Halloween has really taken off in Australia. We never used to celebrate it as children back in the “Old Days”. My kids were keen last year after our neighbours dropped an orange balloon and a note in our box asking if we were interested in participating to put the balloon out the front of our house. What a great idea.

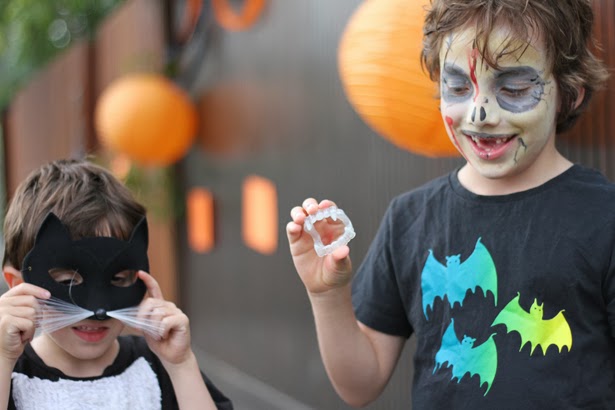
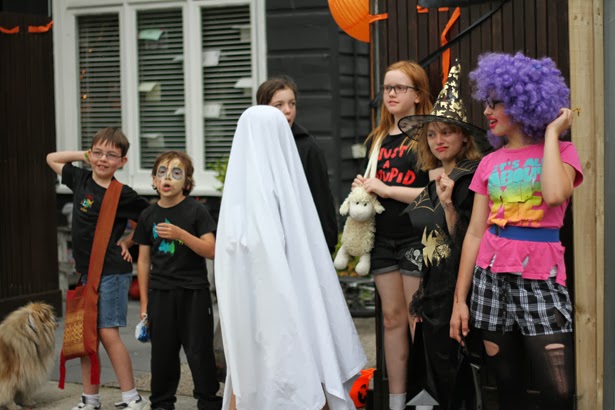
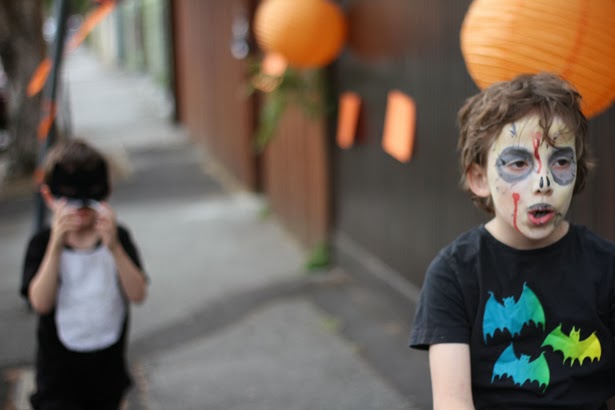
As I am new to Halloween I hadn’t really prepared so I whipped out the face paint, a cat mask and a tee which I sewed earlier for a Cat in the Hat costume. The rest of the kids came out looking smashing and off they went. I soon realised I hadn’t given them anything to collect the treats in and shoved a few plastic bags in their pockets. They did the job but I decided this year I would do better.

I have loads of old pillowcases at the moment that were donated by St Kilda Mums as they can’t use them for health and safety reasons. I am using them to make dresses, buntings, aprons and anything else I can think of for the up and coming St Kilda School Fete.

Whilst researching “recycled pillowcases” I came up with a few posts on Halloween Treat Bags!! What another great idea. I decided to test them out. They are very simple and I think look fab.

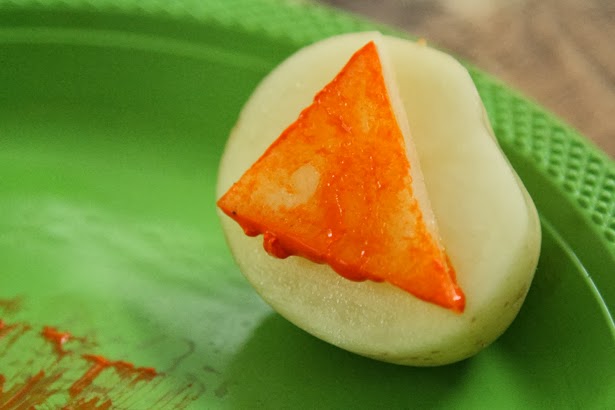
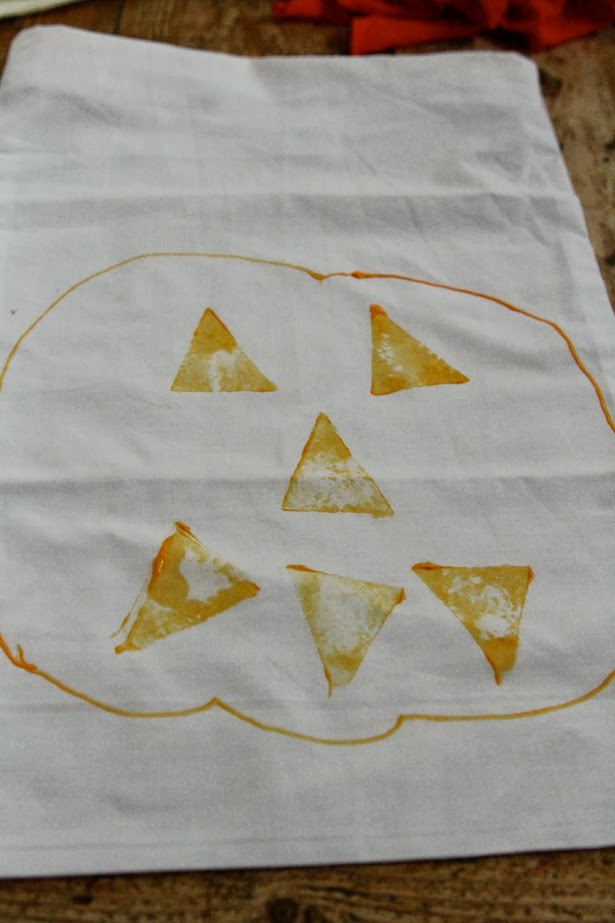
Firstly, cut a potato in half and carve out a triangle shape. Get some orange fabric paint and dip it in.

Get an old pillowcase, preferably white or a light colour. Put a piece of paper inside so that the paint doesn’t come through onto the other side and stain your table (I figured this out quickly). Come up with any design you like for the pumpkin and stamp away. I let my kids do the stamping and they decided on eyes, nose and scary teeth! You can paint a shape like a pumpkin or just leave it with the stamps. Let the pillowcase dry overnight on a flat surface and press on the wrong side when it is dry to set the paint.

IMG_4695

IMG_4697

IMG_4702

IMG_4705

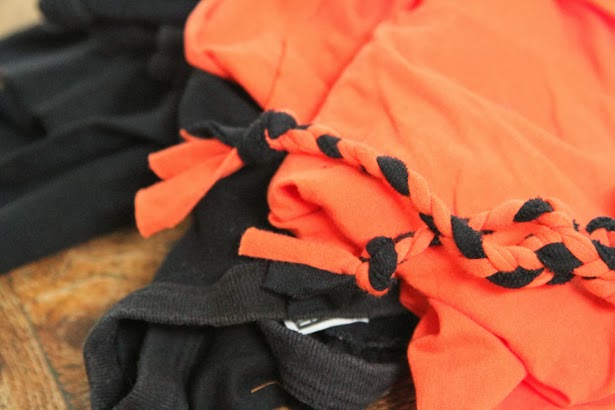
Meanwhile make the tie. Luckily, I had some old orange tee fabric and an old black tee. I cut strips, braided it and made a tie.

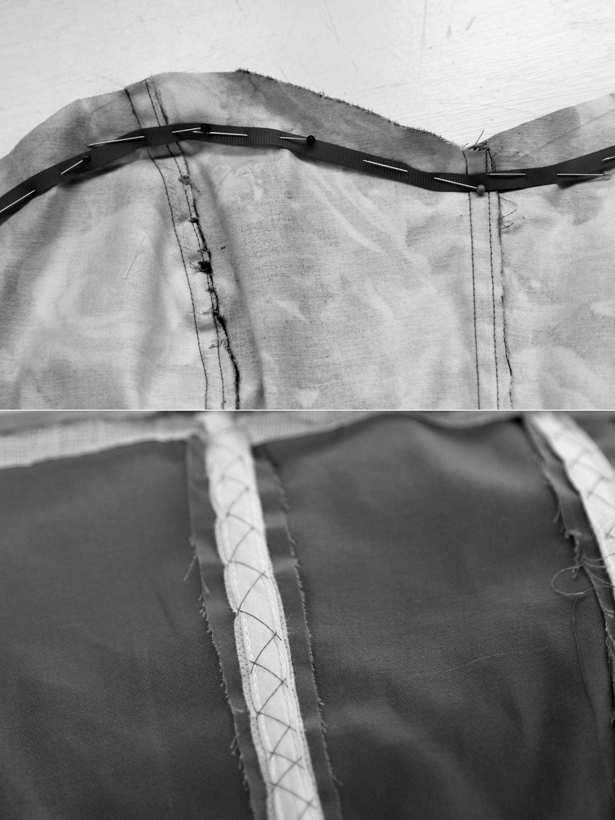
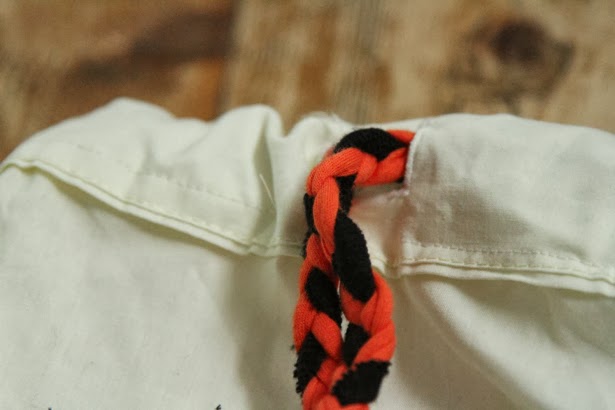
Now here is where your sewing skills come in. Before making the casing for the tie sew two button holes big enough to thread your tie through at the top and in the centre of the pillowcase. Fold over and sew around creating about a 5cm casing. Thread your tie through using a big safety pin.

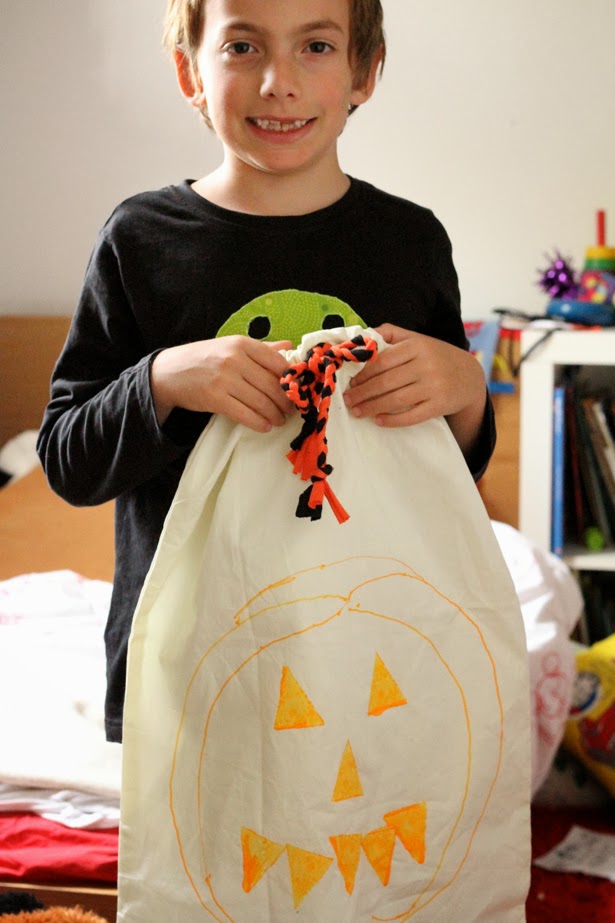
Ta Da! A BIG treat bag for Halloween.

IMG_0106

IMG_0099

IMG_0102

IMG_0100

Bali 50’s style

September 14, 2013

As you can see from this post I am not in the midst of a cold Melbourne winter, I am in fact in balmy Bali on a family holiday. My sister had a significant birthday (fifty, ouch) and invited family and friends to join her in Bali. Of course we jumped at the chance to join her celebrate. We have had a fantastic time here on the beaches, in the pool and just generally relaxing. Perhaps a few too many G&T’s and Nasi Gorengs but I’ll worry about that when I return home.

About a week before we came over I noticed I had a little summer dress cut out in my UFO box (unfinished objects). I had cut it out almost a year ago and didn’t bother to get started on it. After all the sewing I’ve been doing for the School fete lately I wanted to do something for myself and something quick. This was the perfect project.

dress4

dress3

The fabric is a gorgeous Liberty of London Tana lawn from Tessuti Fabrics called Red Stefan. It is 100% cotton and a bit pricey but once you start sewing with it and wearing it as I have now found out you won’t be at all worried about the price of it. It is soft and beautiful to sew.

I used a Burdastyle pattern 50’s Halter Dress edition 07/2012 style #133. This dress pattern was first published in burda Modern (now burda style magazine) back in 1950. The instructions are a little tricky to follow but if you are not a complete beginner you will figure it out pretty easily by looking at the picture provided. The trickiest part being the insertion of the piping into the band on the bodice. It’s actually quite easy to do but the instructions use too many complicated words which just confuse you. Remember just follow the picture! I only had 1.5mtrs and not the required 2 mtrs so I altered the skirt to be just slightly narrower than a full circle. It worked just fine.

dress7

dress2

dress2-1

I used the smallest size but due to my depressingly small bust and I still had to shave a few mm’s off the upper bust line. It still needs a bit of filling out which was fixed by using a very padded bra. Who needs a boob job! The bodice is lined in the same manner as the outer bodice which I really loved. It has a real 50’s look about it with the pointy boobs and small waist. The halter really accentuates this too and I love the piping detail.

I hadn’t quite finished it before we boarded the plane to Bali so I grabbed the needle and thread and packed in in my suitcase. I figured it would be a perfect dress for Bali. All I need to do was hem and hand stitch the lining in which I finished in our outdoor lounge area in the villa. It was such a different sewing experience, bikini on and needle and thread in hand!

Highly recommended pattern and fabric.

This trip also happened to coincide with mine and Tony’s anniversary of 14 years together which we celebrated at the Rock Bar in the beautiful Ayanya Resort. It was gorgeous watching the sun go down and sipping Lychee Martinis and the dress looked perfect!

dress9

dress1

dress6

dress10

dress11

Flaming Red, Tessuti Awards 2013 entry

August 4, 2013

This is my entry for the Tessuti Awards 2013.

The brief was to create a knee length (or just above) dress that’s all about the WOW and NOW factor. Something that would fabulous at a red carpet event, swanky cocktail party, the races or a fancy formal wedding. You must use either their Flame Red fabric which is a french taffeta or the Phantom Black, a dobby spot which is also a French fabric. The prizes are amazing, a flight valued at $2500 is first prize and an overlocker is second. I was not sure if I wanted to enter as there are so many amazing and creative sewers out there and last years entry’s were incredible.

Continue reading →

Funked up Capelet

July 27, 2013
This is a denim Capelet I drafted and made a few months back. I was inspired by the Burberry capelets I have seen in the mags and online.
I haven’t drafted many patterns in the past few years so it was a nice easy project to get my head back into it. I used Pattern making for Fashion design by Helen Armstrong as a guide. There are instructions on how to draft a cape so I started with that and then modified drastically!
I had some cheap denim from Darn Cheap Fabrics so decided I’d use it incase it was a disaster. I also made a muslin up to make sure it was the right fit and was careful to transfer all the markings with tailor tacks.
It looked a bit boring so I thought I’d funk it up a bit and added some jean studs. I also found some skull satin for lining (which I was going to make some boxer shorts out of for my son)….still plenty left!
I added some shoulder pads as it seem to sink a bit into my shoulders without them. It’s probably a touch too short but it will do this time.
I was hoping to share with you the pattern but my computer skills are limited when it comes to drafting.
I might clean up my original draft and upload at a later date.
I

in the making
Burberry

Missing in Action

June 14, 2013

I have not been doing a lot of sewing lately. I think there are a number of reasons.

It’s winter and I like sewing summery stuff.  I race bikes and have been doing a lot of training lately and I started making a tailored jacket that I have got sick of so can’t seem to get beyond that.

Last week my friend emailed me to see if I would make up a skirt for her friends little girl. I had no choice but to get the sewing machine out again. Whilst sewing this gorgeous little skirt my mojo came back and I figured out a few things about myself.

I like quick projects that I can sew in at least a couple of weeks. I like dresses and skirts mostly and I like pretty fabrics. I think my jacket has become boring. I am a Gemini after all! I tried to do memademay and gave up after a week!

Anyway, in short I think sewing the skirt has given me a lift. I have cleaned out the cobwebs in the sewing room and sorted fabric into wovens and knits, work in progress and future projects.

This is the skirt I made up this week. It is the same pattern as the tutti fruitti skirt I made last year.

handmade flower using this tutorial
Petticoat
Handmade Bias Binding
Me too busy racing bikes to sew!

Me- Made -May-’13 Week One

May 13, 2013
I have decided to join the memademay’13 challenge this year as I am one of those sewers (probably one of many) who makes up all of these fab outfits and never wears them! Why is that I wonder? Most likely because I find some gorgeous fabric and gorgeous dress pattern, fantasise about how fantastic it is going to look (and how great I am going to look in it), sew it up and then realise I have no where to wear it. But why not wear them every day? Having a challenge like this is forcing me to be creative with the outfits I have sewn. Why not wear a gorgeous evening dress and make it a bit more “day like” with a denim jacket or knitted cardy. 
I have pledged to wear or sew something every day in May. I’ve decided that my kids can be involved too because I have sewn a lot of clothes for them.
I started a little late into May but have been adding pics to Nine Stitches on Instagram whenever I can. Here are a few shots from the past week at home (mostly in the kitchen)
From top left clockwise: Joni Bell Sleeve Top, Capelet (yet to blog about) free pattern coming soon!
Bat Boy Cape, a Beanie my mum made for me, Shift dress from Burdastyle
Modern Vintage sewing competition and finally Petal pushers.
Pictures can also be viewed at Nine Stitches on Instagram

Oliver’s Big Heart

May 4, 2013

Ok, I know this is a blog about my sewing but I am so proud of my son at the moment that I just have to share with my fellow sewers.
My seven year old son Oliver raised money for the Childrens Cancer Center by having his hair shaved off.
He initiated the idea himself and raised over $600 for the charity.
Here is his own little blog about it.

http://oliverprysten.blogspot.com.au/2013/05/the-head-shave.html

Gridlock Tailored Jacket WIP and fabric giveaway…

April 12, 2013

Tessuti are currently running a sewing competition using their fabric called “Gridlock”. You can sew anything you like using this fabric for your chance to win $1000! Sounds great, so of course I went online and ordered a couple of meters.

I was in the middle of sewing my Hot Summer Rose outfit when the comp started so didn’t really get going on it until about a week ago. I had my mind set on sewing a tailored jacket for some reason. Perhaps because I have seen some great tailored jackets on the runway and RTW lately. I envisioned a pair of tailored shorts to go with it. The comp finishes tomorrow night (April 3rd) when I will be sailing the high seas to Tasmania with my boys. Unfortunately I am nowhere near finished, in fact I really have just started as far as tailored jackets go. It has taken me a week to cut all the many many pieces of muslin, lining, organza, lining, canvas etc etc. I have just started hand sewing the canvas to the front.

Love this look

Even though I won’t be able to enter it in the comp, I am still eager to get it done. Here is my work in progress report so far.

I traced all the seams and notches onto the calico to create a muslin. I also thread marked all of the seam lines. I had thought about skipping this process as I had googled it and alot of people had thought it was a bit of a waste of time but I totally disagree. I think that it has saved me alot of heartache down the track. It makes lining up the seams really accurate.

I made a few adjustments to the muslin. 
Thread marked all of the seams. I went off a bit on a few…oops!

I tailored tacked all of the markings from the calico muslin onto the Gridlock fabric

Catchstitching the canvas to the darts

So this is as far as I got before leaving for Tassie. More to come…
I have 80cm of this Gridlock fabric from Tessuti to give away. Fabric is a double-sided Jacaranda blue/ivory 77% Poly 21% Cotton 2% Elastane jacquard. Width:125cm 
I think it would be the perfect amount for a cute little A line skirt or some funky shorts or maybe a vest? 
Check out these amazing creations made for the competition at Tessuti and congratulations to the winners. Just leave a comment below and sign up to follow me. I’ll pick a random “winner” on April 30th.
Follow my blog with Bloglovin

Hot Summer Rose

March 24, 2013
I love the name of this fabric “Hot summer Roses”. I picked it up from Tessuti last year. I think they have sold out now. It is a cotton/spandex mix which is machine washable… bonus! I have a tendency to buy fabrics that need dry cleaning and tend not to wear them as I can’t be bothered with the cleaning process.
I had pinned a photo to my pinterest board last year thinking I would make the strapless top and skinny pants to match. I decided on a mini skirt instead as I didn’t have quite enough fabric.  I used Burda pattern 01/2012 leather bustier #124 for the bodice and drafted my own peplum. For the skirt I used Burda Magazine 7/2012 120 skirt which I also made up in the RTW designer knock off competition. I really love this skirt pattern. It has a really high waist and curved darts which start at the side seam right at waist level. It’s a really good fit.
I boned and lined the bodice which I’ve never done before. I use a herringbone stitch to sew the boning tape in place and hand stitched the lining to the bodice. I also attached a grosgrain ribbon to the upper bodice to help with the fit. I picked up this technique from Gertie’s sew retro bombshell dress lesson which was a really handy tip. I haven’t sewn the bombshell dress yet but I have used a few techniques from this lesson and have found it really easy to follow.  Gertie’s not your stereotypical sewing teacher which I love.
I have a very small bust so I had to take it in quite a bit. I adjusted it at the seam lines by shaving off about 1 cm. I also shortened the bodice.
I had a question on my last dress on how I get the bodice to fit so well on my small frame. Basically, I fit and fit and fit. I will fit to the dress form and pin where I see any bagginess at all. I then sew and re fit. If it needs adjusting still, I will undo and redo. I am not happy until the fit is good.
I could not live without my dress form. If you don’t have one, get one. I picked mine up form EBay for fifty bucks and its been worth every cent. Also boning does wonders for your bust! The bodice stays up really well. 
I lined the skirt as I didn’t think the fabric was firm enough. The spandex in it is probably not the best choice for a bustier but it turned out OK. The fit feels great although I think the boning is pushing into the waistline a bit too much. I may have to unpick and shave off a few mm’s . I’ll wear it tonight to my friends house for dinner and see how comfy it is.
I have loved sewing this outfit. It came together really well and I love the mix of machine and couture techniques.
I highly recommend both of the patterns.
Construction of Bodice
Burda Magazine 7/2012 120 skirt 
01/2012 leather bustier #124
← Older posts
Newer posts →

Useful

  • Frequently Asked Questions
  • How to Print and Assemble a PDF Pattern
  • Sizing Chart
  • Terms and Conditions
  • Cancellations Policy
  • Privacy Policy
  • COVIDSafe Plan
  • Contact

Recent Posts

  • Hack the Sage Smock into a Bow-Front Dress September 15, 2025
  • Sewing Machines. Which one is best for a beginner? October 23, 2023
  • Find your Sewjo February 28, 2023
Sew This Pattern is about getting creative and making exciting clothes that will show off unique style and personality. Not only will you get excited about sewing your own clothes but also actually wearing your own DIY fashion!

Subscribe for pattern news and updates!
Payment methods
© Sew This Pattern - Indie Pattern Designer
  • STP Sewing Patterns
    • STP Sewing Patterns
    • Sizing Chart
  • Indie Designer Printed Patterns
    • Tilly & The Buttons
    • Closet Core Patterns
    • Paper Cut Patterns
    • Sew Over It
    • Style Arc
  • Fabrics & Notions
    • Cottons / Linens and Blends
    • Georgette
    • Woolens
    • Labels
    • Needles
    • Zippers
    • Interfacings
    • Miscellaneous
  • Sewing School
    • Sewing School
    • Cancellations Policy
    • Sewing School Instructors
    • Sewing School Mailing list
  • Blog by Nine Stitches
  • Facebook
  • Pinterest
  • Instagram
  • Youtube

Cart

Sew This Pattern – Online sewing shop
  • STP Sewing Patterns
    • STP Sewing Patterns
    • Sizing Chart
  • Indie Designer Printed Patterns
    • Tilly & The Buttons
    • Closet Core Patterns
    • Paper Cut Patterns
    • Sew Over It
    • Style Arc
  • Fabrics & Notions
    • Cottons / Linens and Blends
    • Georgette
    • Woolens
    • Labels
    • Needles
    • Zippers
    • Interfacings
    • Miscellaneous
  • Sewing School
    • Sewing School
    • Cancellations Policy
    • Sewing School Instructors
    • Sewing School Mailing list
  • Blog by Nine Stitches
  • 0
Sew This Pattern – Online sewing shop
Verified by MonsterInsights