Grainline, Toile, Cutting and transferring markings
It’s time to start cutting your Venus Kimono!
The Venus Kimono is a one size fits all pattern however, if you want to make sure you are happy with the style lines and fit I highly recommend sewing up a toile before cutting out your fashion fabric. A toile is a mock up in a cheap fabric. Try and use a fabric that will be similar to the fabric you will be using for your kimono.
If you can’t be bothered sewing up a toile then you can skip to the next step but it’s well worth it if you want to end up with a kimono that you will love! I’m using a fabric I bought for $2 a meter and it only took me about 20 minutes to cut and sew up my toile.
Sewing up your Toile.
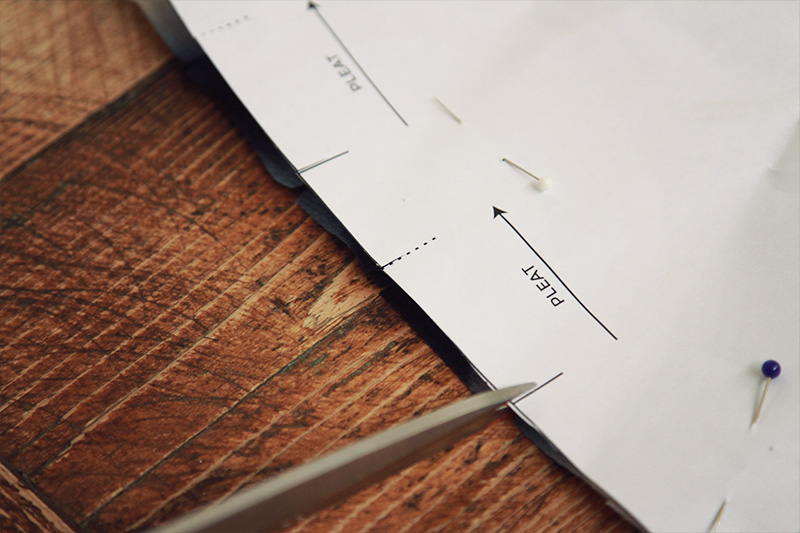
- Cut out your toile according to the fabric layout below and mark notches and pleats with a small snip with your scissors.
- Sew your centre back seams together using a 1.2cm seam allowance.
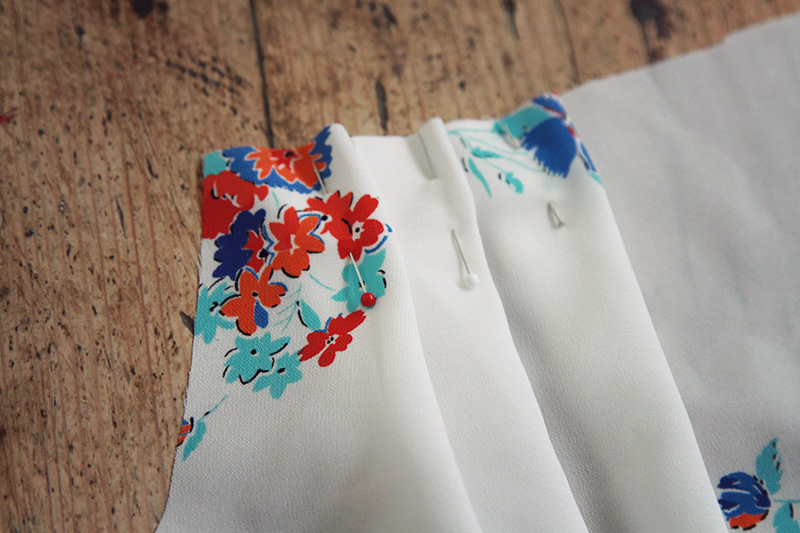
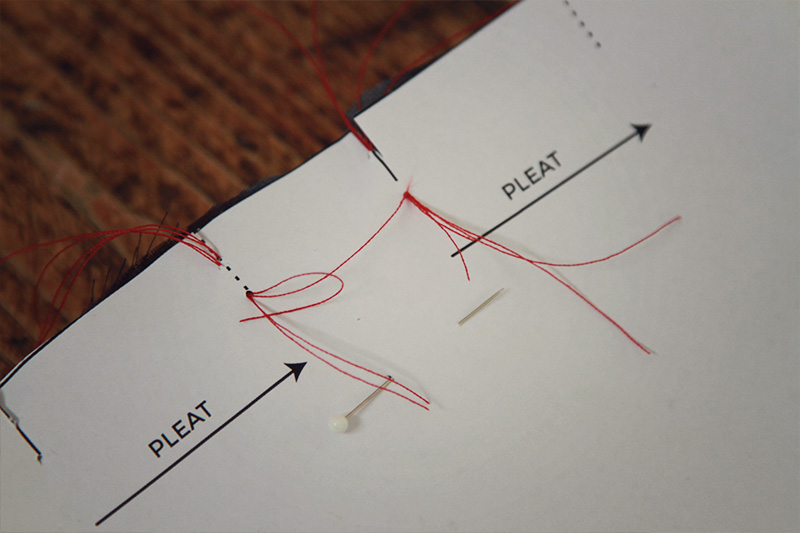
- Create pleats at shoulders by folding the fabric on the marked solid line to the placement line. Pin and baste in place on the seam line.
- Sew front to back at shoulder using 1.2cms seam allowance.
- Sew front to back at side seams using 1.2cms seam allowance.
Now try it on or hang it on a mannequin. Remember you will be hemming the hem and sleeves using a 1.2cm rolled hem. If you wish you can cut the hem allowance off so you can get a clear picture of how the finished kimono will look. Are you happy with the fit and design? Ask yourself a few questions. Do you want to make it a bit longer or narrower in the sleeve? Do you want it to be a bit longer or shorter in length?
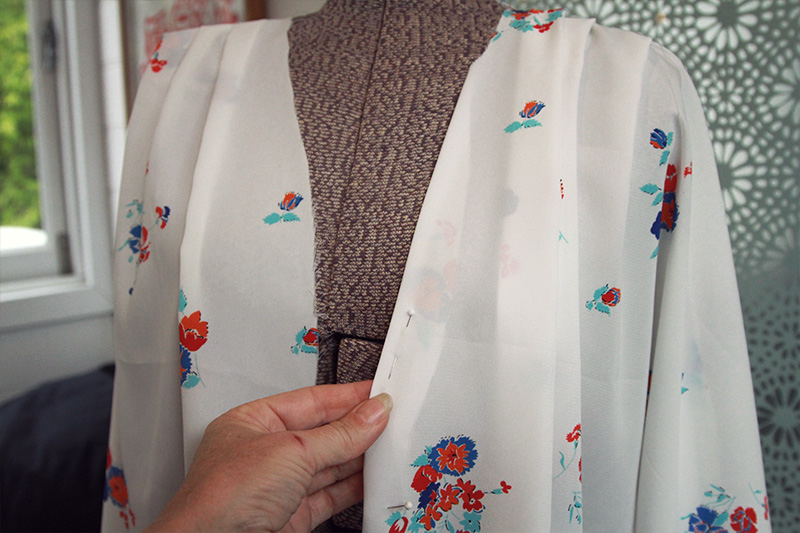
I’m very petite so I like to take a little off at the centre front curve. Ladies with fuller busts might like to increase it. It’s totally up to you. The Venus Kimono is a great design to play around with as it’s such a simple design.
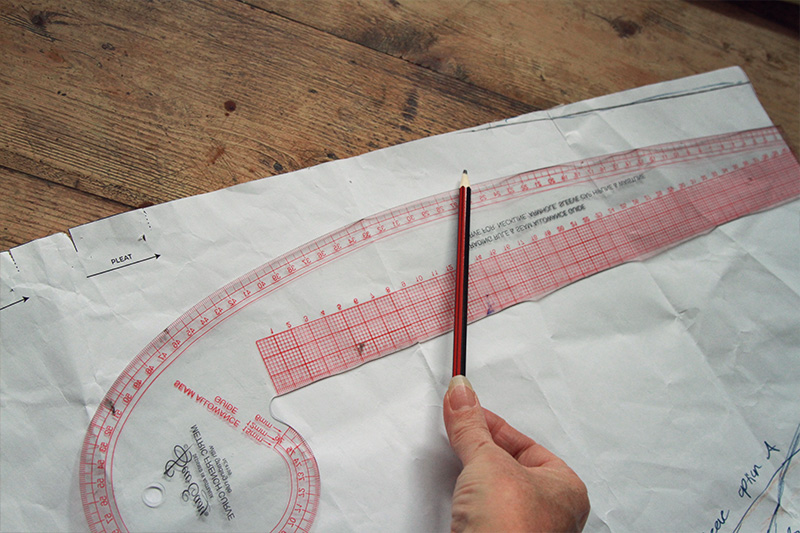
This is an example of narrowing at the centre front and sleeves. I have taken a few cm’s off the curve at the CF and have continued the design line blending it near the bottom. Try to keep your design line as close as possible to the original design using a French curve ruler.
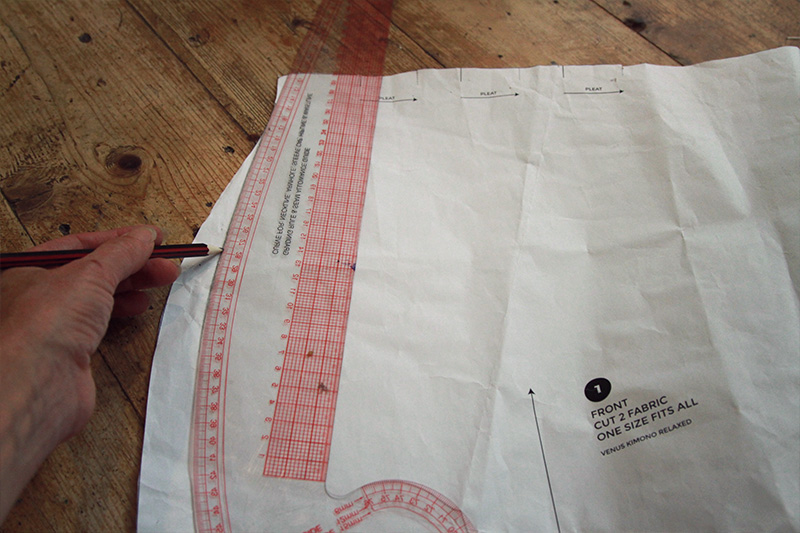
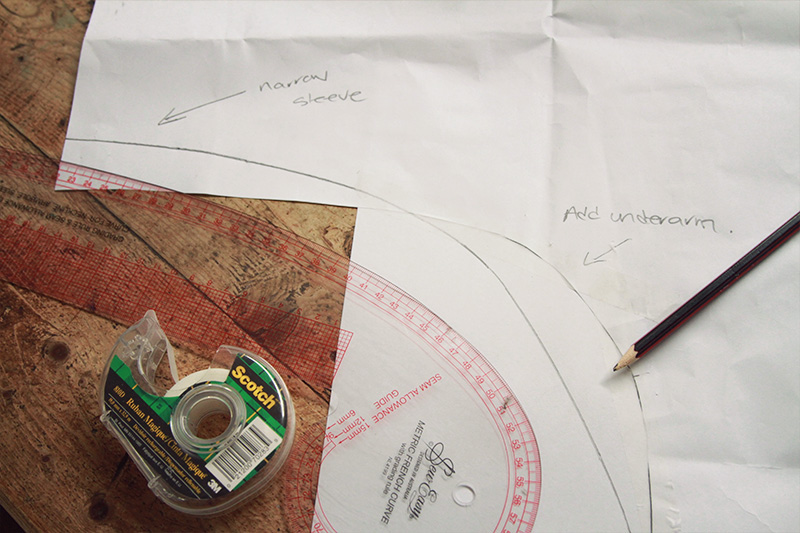
This is an example of narrowing the sleeve and adding more to the underarm to give it more of a batwing look. You could also narrow it at the top part of the sleeve but keep in mind that you have pleats to deal with so start blending the line after the pleats.
Ok, now if you are happy with your pattern it’s time to get your fabric ready for cutting.
Grainline.
The Venus Kimono has pleats and a beautifully curved centre front so it is really important that your fabric is on grain before cutting out the pattern. Learn about why the grainline is important and how to straighten it in this post“How to straighten a fabrics grain” before proceeding to cutting out your pattern.
Once you have your fabric on grain it is time for laying out your pattern.
In the instructions, find the cutting layout for fabric widths on page 5. Layout your fabric according to the instructions.
115cm wide layout
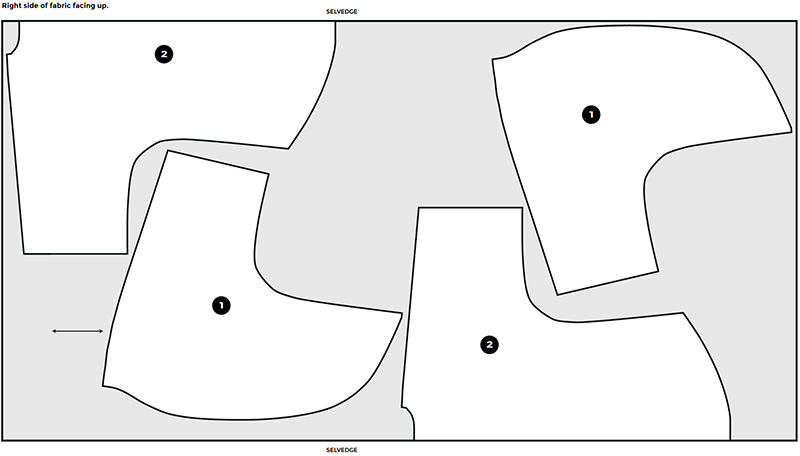
If you have narrower fabric (115cm wide) you will lay it out in one single layer as it’s not wide enough to fold and cut x 2 pieces at once. You will be flipping your pattern pieces over. Make sure you lay it out exactly the same as the layout instructions because you don’t want to end up with two left fronts! (I’ve don’e that before). A little tip when you are flipping your pattern pieces over, make sure you trace the grainline onto the other side of your pattern first. The computer paper is not see through like your regular tissue paper patterns so it is hard to see any markings.
150cm wide layout
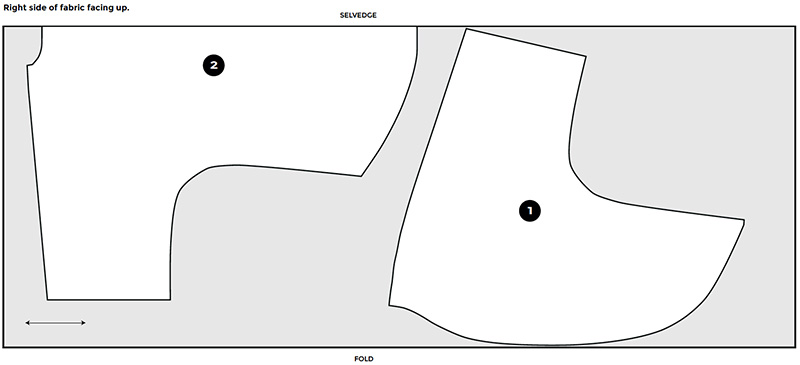 If you have a wider fabric (150cm) you will be able to fold it lengthwise, selvage to selvage. Also make sure if you are using a fabric that directional print or nap that all the pieces are running the same way as you lay them out. There is nothing worse than having upside down flowers or animals on your garment (and I’ve done that before).
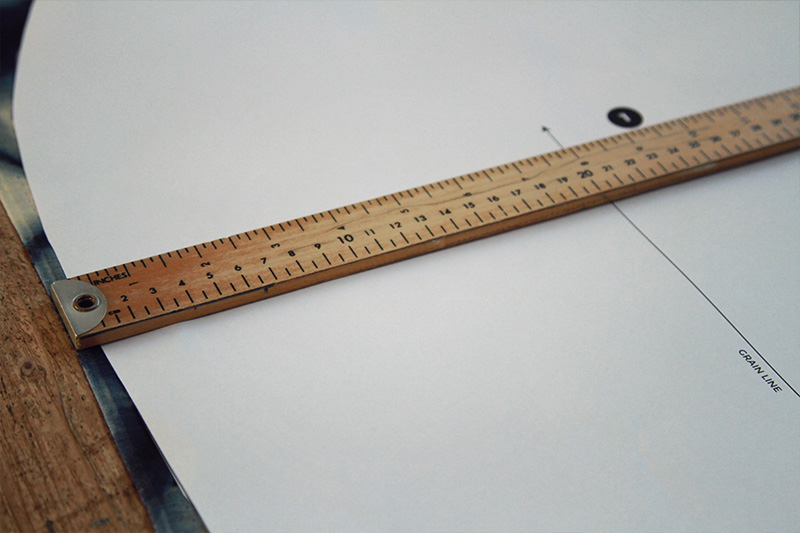
Lay out the pattern pieces as the cutting layout with your grainline running parallel to the selvages. Use a ruler to measure from the top of your grainline to the selvage and the bottom of your grainline to the selvage to ensure you have the grainline running even and parallel.
Pin the pattern pieces in place or use pattern weights if you have them. Carefully cut out your fabric pieces.
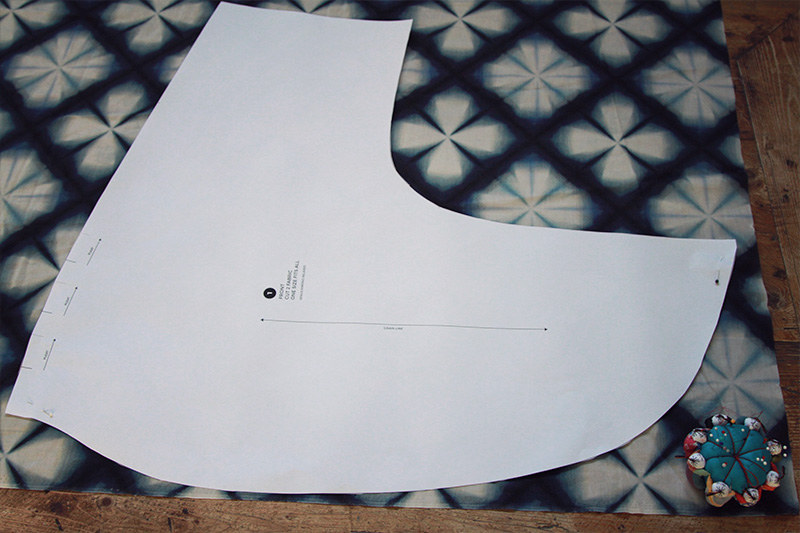
Once your pieces are cut out you will need to transfer any markings. Snip the notches along the pattern edges using the tips of your scissors and snip the pleat guide lines. Make sure you only make little snips and don’t snip further than the 1.2cm seam allowance!
If you prefer, you can sew tailors tacks on the pleat lines or use chalk but snipping works fine and is quick!
Next up is Day 4, Sewing French seams and pleats.
Please comment below if you have any questions.
Michelle
Hi
Would it work to take the seam allowanace of the back piece and cut it on fold (as one piece)?
Annie
Hi Michelle. Absolutely! The grain line runs parallel to the fold line so no problem. Just trim off 1.2cm from the CB pattern piece.
Annie 🙂