
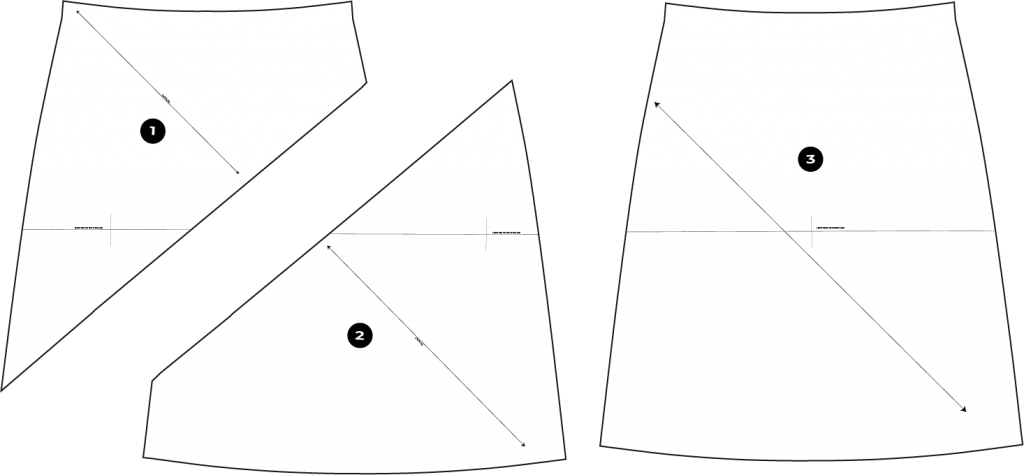
I realised after creating the Esther Bias Midi skirt pattern that to shorten or lengthen it is not as straight forward as a regular shorten/lengthen alteration as the front has an asymmetrical panel.
If you were to shorten or lengthen from the hemline, the proportions of the front panel would not be the same as the original design. You can definitely do it this way if you don’t mind changing the proportions of where the seam finishes but to keep the proportions the same it’s best to shorten or lengthen above the front panel seam.
I’ve created this tutorial to help you with this alteration.
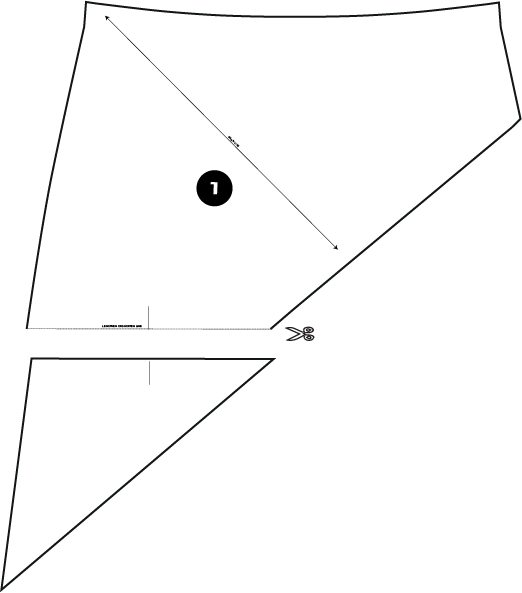
I am only showing the upper panel in this tutorial but the same instructions apply to the lower panel and the back piece is straight forward as per normal lengthening and shortening alterations.
Firstly, decide on how much you want to lengthen or shorten your skirt by. I wouldn’t recommend taking off or adding too much from the front panel (max 10cm) as it may distort the design. You can always add or take off an extra 2 or 3cm’s from the hem without it changing it too drastically.
Cut the pattern piece at the “lengthen or shorten” line.
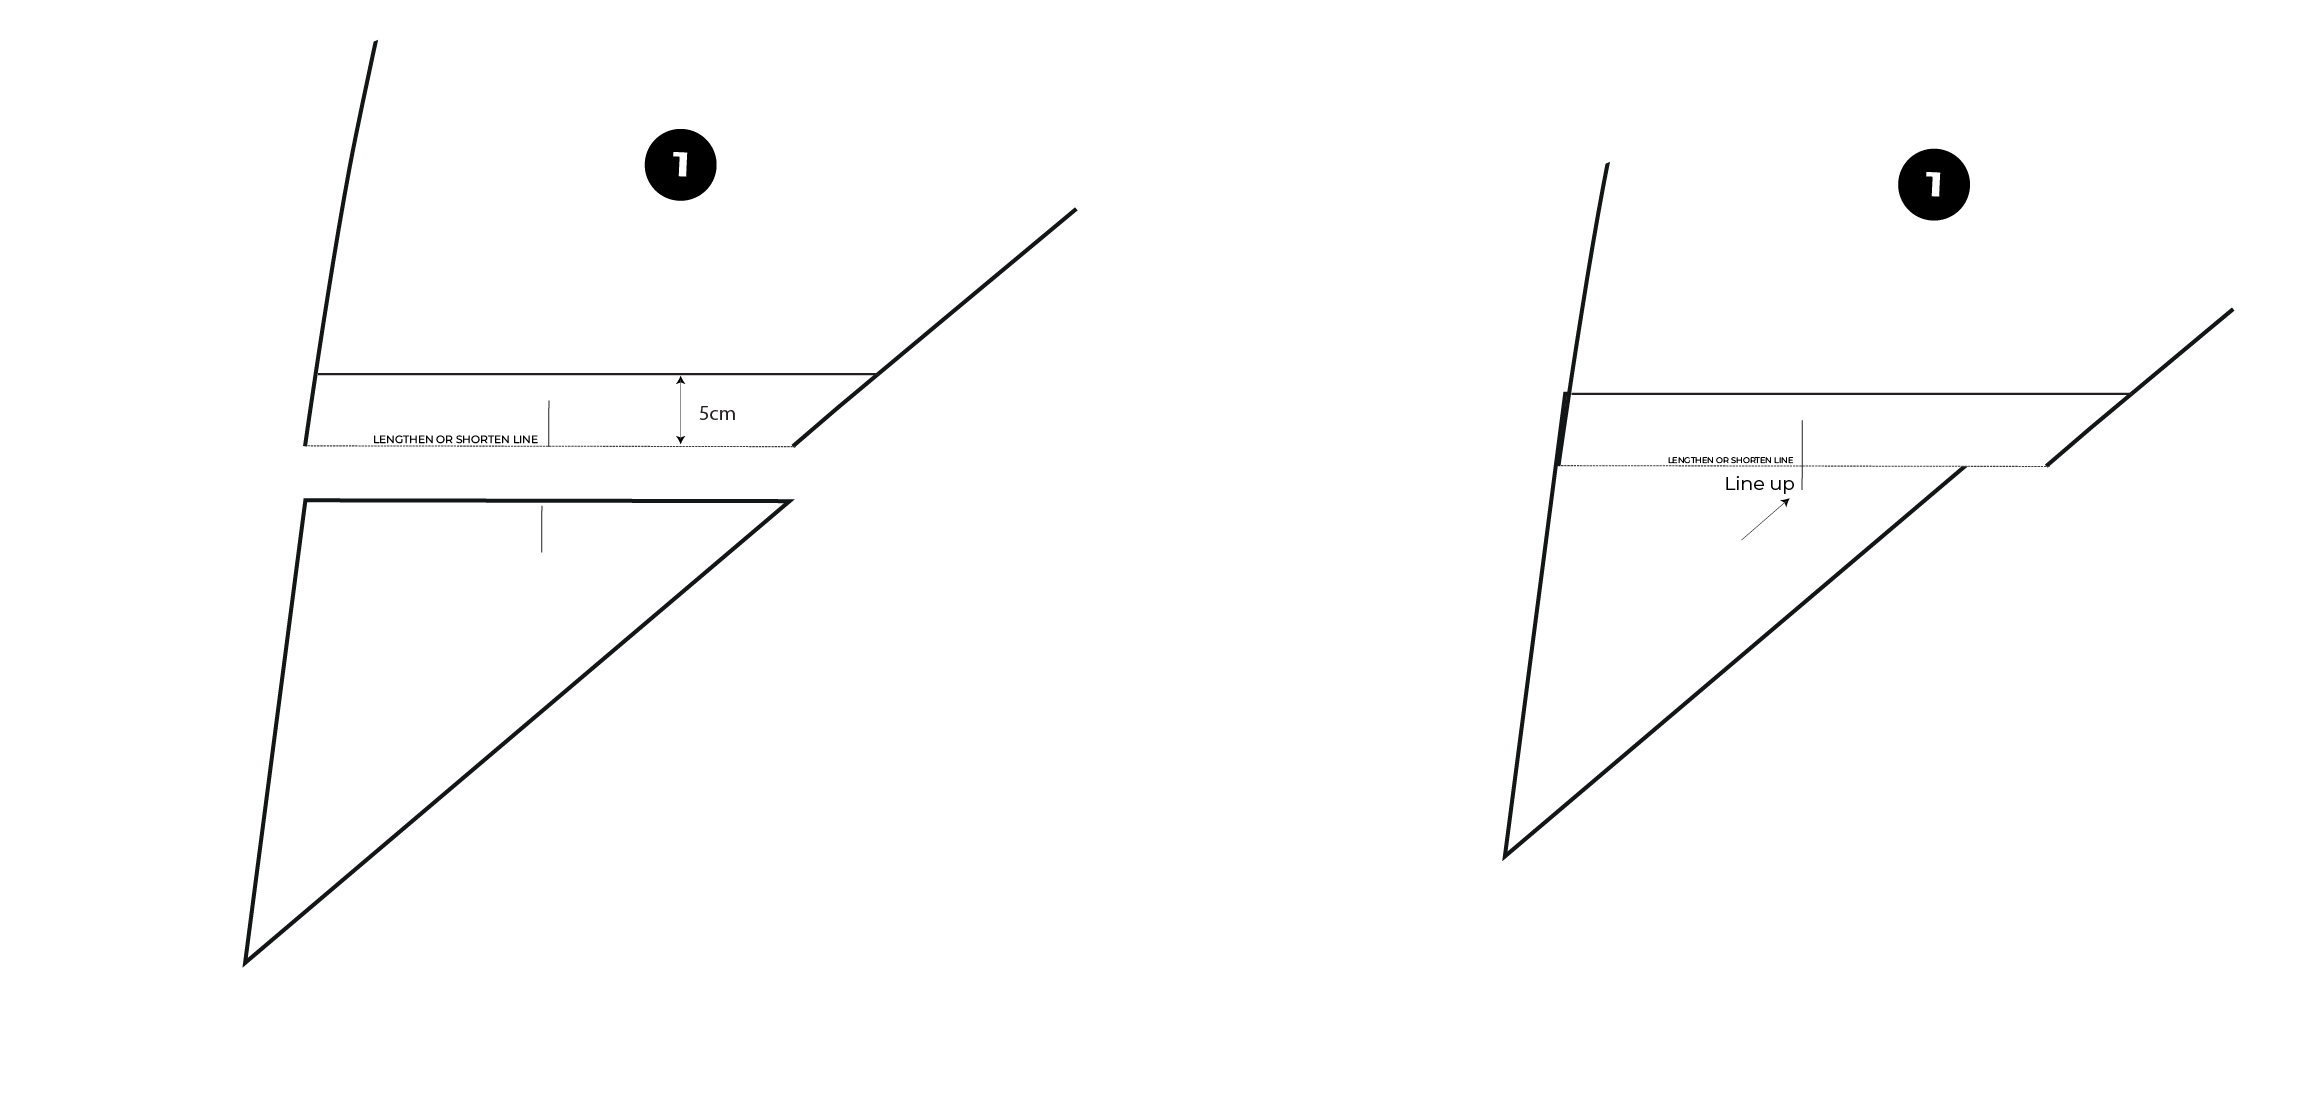
To Shorten
Draw a line evenly across the pattern piece above the lengthen or shorten line measuring the amount you wish to shorten your skirt by. Make sure this is even all the way across, use the line provided to square across from.
Move the lower part of the pattern up underneath the upper pattern piece lining up the perpendicular lines provided on the pattern.
Once this is lined up perfectly, tape it together.
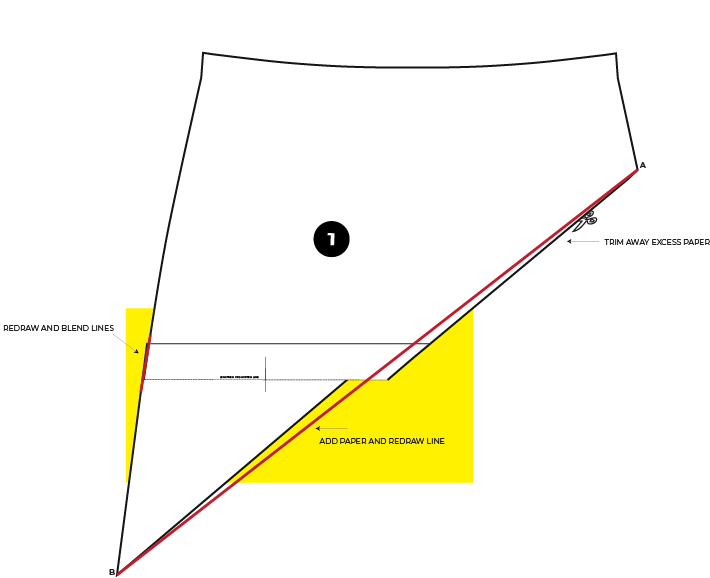
Pop a new piece of paper underneath the taped pattern piece.
Re draw the line from A to B in a straight line.
Re draw and blend at the side seam .
To Lengthen
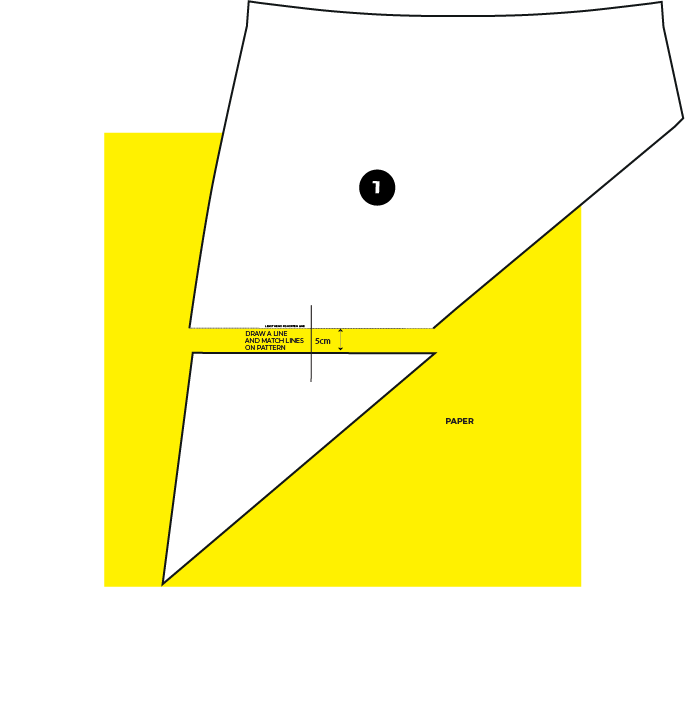
After cutting the piece at the lengthen or shorten line, place a large piece of paper underneath the pattern pieces.
Draw a line on the paper a little longer than the amount you wish to lengthen and match up the lines on the pattern pieces. Measure the exact amount you wish to lengthen and tape together. Make sure it is even all the way across.
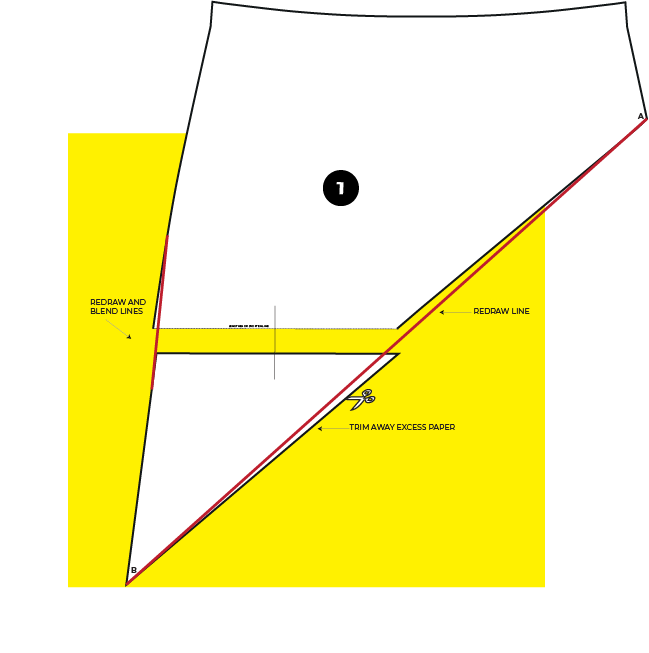
Re draw the line from A to B in a straight line.
Re draw and blend at the side seam .
For both Shortening and Lengthening
Re cut your pattern, cutting off any excess paper.
Repeat this on your other pattern pieces. The back will only need to be re drawn and blended at the side seams.
Line up any notches that were trimmed off and transfer over to the new pattern pieces.
That’s it, not too hard but a little tricker than a normal straight line!