This wrap blouse sewing project is a cropped wrapped blouse which is very easy pattern to sew. Its a great beginner project with only the buttonholes requiring intermediate skills. For this reason I’ve included a few quick tips on how to sew buttonholes.
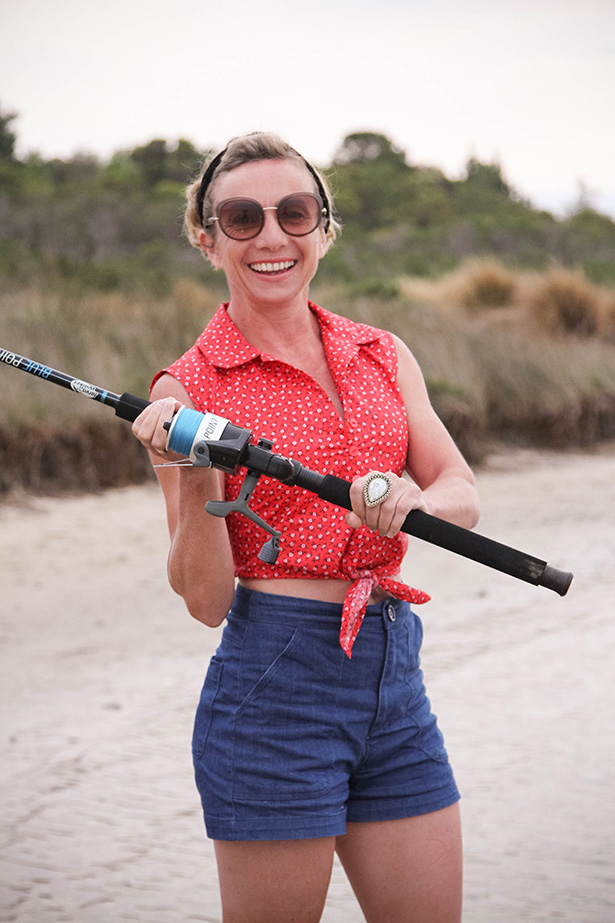
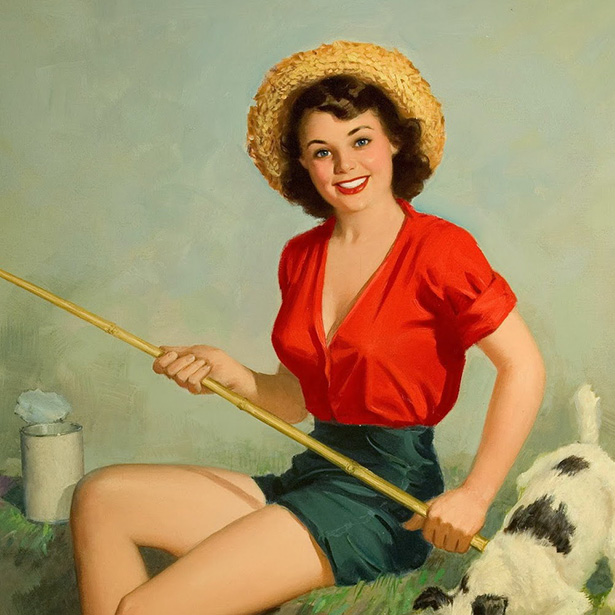
Pin up 40’s and 50’s style is one of my favourite looks. I love the buxom ladies with red lips, pin curls and (these days) full sleeve tattoos but I’m not courageous enough to go all out and pull it off. I’ll settle for full skirts and blouses and pop my hair up in a pseudo quiff occasionally. Sewing was a big part of this era also, so this style seems to fit perfectly into today’s sewing pop culture. This little wrap blouse definitely falls into wannabe pin up style. Especially when you add some high waisted denim shorts and a fishing rod. I even found a painting of a girls from the 50’s with a similar outfit on!
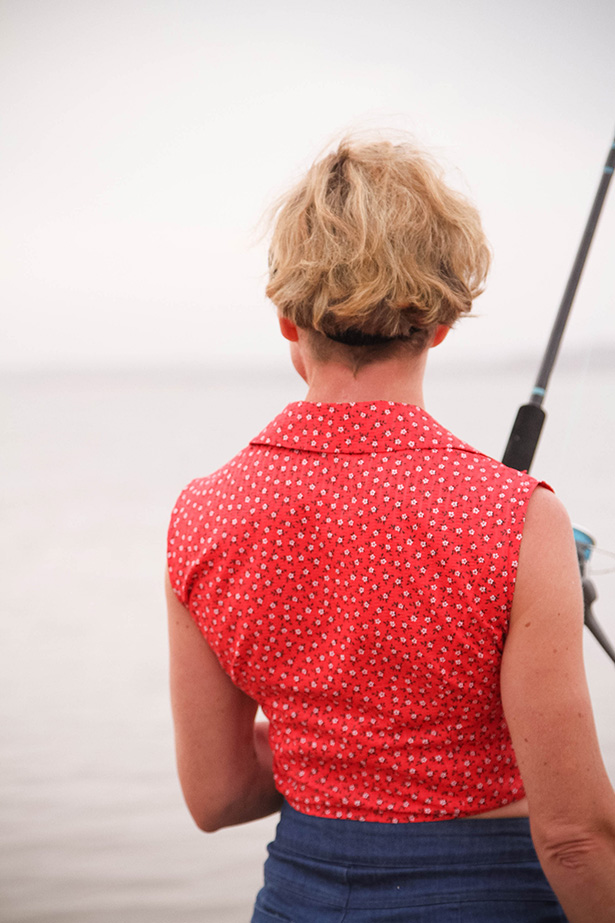
The fabric is a printed seersucker which I picked up on sale at Spotlight. Pattern is Burda 6924 (young) wrapped blouse. There are two versions, A and B. I chose A, the sleeveless version as I only had a meter of fabric. It’s a “young” style so I was a little worried it might be a little too cropped but it turned out ok in the end. You have to wear high waisted pants or skirts with it unless you want a lot of your midriff showing.


Here are a few tips on how to sew a buttonhole on your wrap blouse. The best tip when sewing buttonholes is to practice on a piece of scrap fabric until you are completely happy with it. Make sure the fabric is the fabric that you are using in your garment as the stitch length and width is determined by the fabric. Before you start, make sure you have marked all of your buttonholes on your pattern as per the pattern instructions.
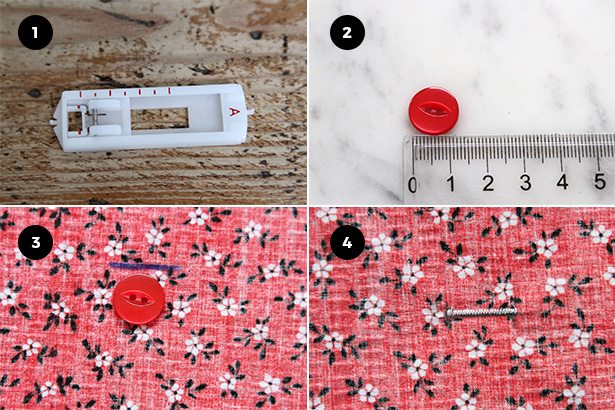
1. Use a button hole foot to easily guide the button hole otherwise you will end up with a very crooked button hole.
2. Measure your button and add 3mm to this measurement to allow for the height of your button.
3. My button is 1.3cm so I measured and drew a button hole line of 1.6cm.
4. Center your marked buttonhole line under the machine foot. Using the buttonhole setting on your machine, stitch the first side of the buttonhole. The stitch can vary in length and width depending on the fabric you are using but they need to be nice and tight and close together.
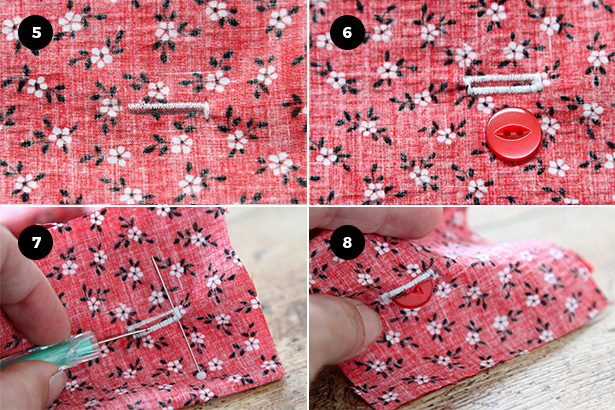
5. Stitch a bar tack at the end of the first line of stitching.
6. Stitch the second side of the buttonhole and finish with a bar tack at the other end.
7. When it comes to slashing the buttonhole, pop a pin in either end before cutting the buttonhole to prevent ripping through the bart tack. I always start from one end and slash to the pin then turn it around and slash from the other end.
8. Pop a button through to check it is the right size and your ready to sew “real” buttonholes on your garment.
I didn’t catch any fish but I had fun pretending!
Sonia
Cute and fun!! I love it.
Danielle
Looks wonderful and love the pics – will be my next project! Thanks also for the tips.
annie
Thanks Danielle, I hope your project goes well.
Claire
I love it! The fabric is really cute.