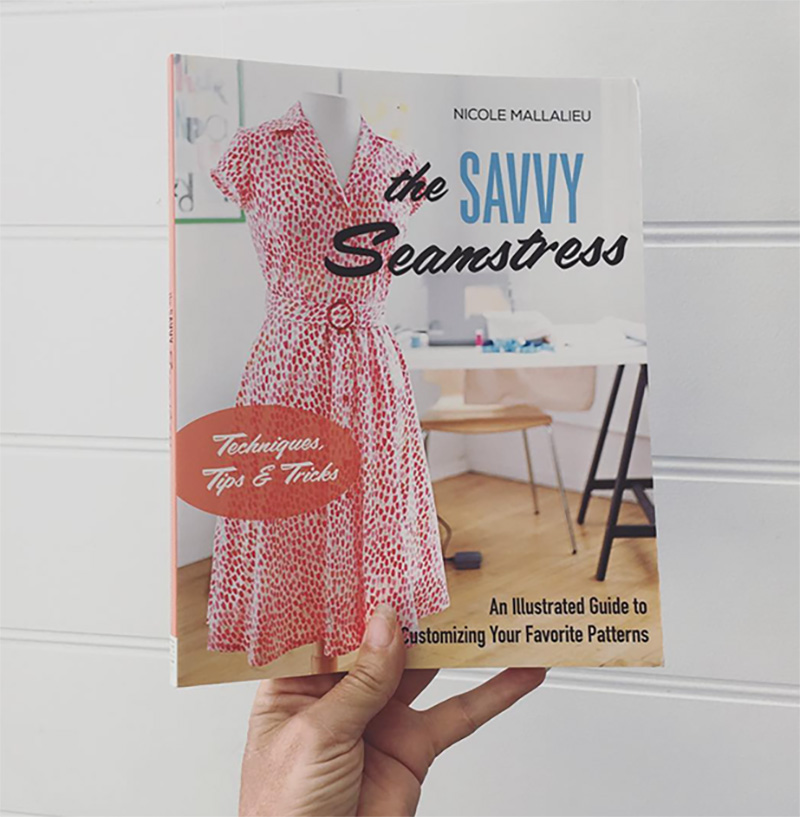
Today I am reviewing the book The Savvy Seamtress written by the very talented designer, pattern maker and teacher Nicole Mallalieu. My review is part of a blog and instagram tour run by C&T Publishing which runs from 23rd of April until the 3rd of May.
During the tour the book will be reviewed by other bloggers and instagrammers and there will be give aways of the book at the end of the tour for a few lucky readers so make sure you tune in to the schedule below.
The Savvy Seamstress book came about from Nicoles experience teaching at a fashion college . Nicole found that a lot of the information and resources for pattern making and industrial sewing was a bit too complicated for the students just starting out. It needed to be broken down into more achievable steps for her students so that they could actually make the garments they had designed. She realised that this information could also benefit the home sewer.
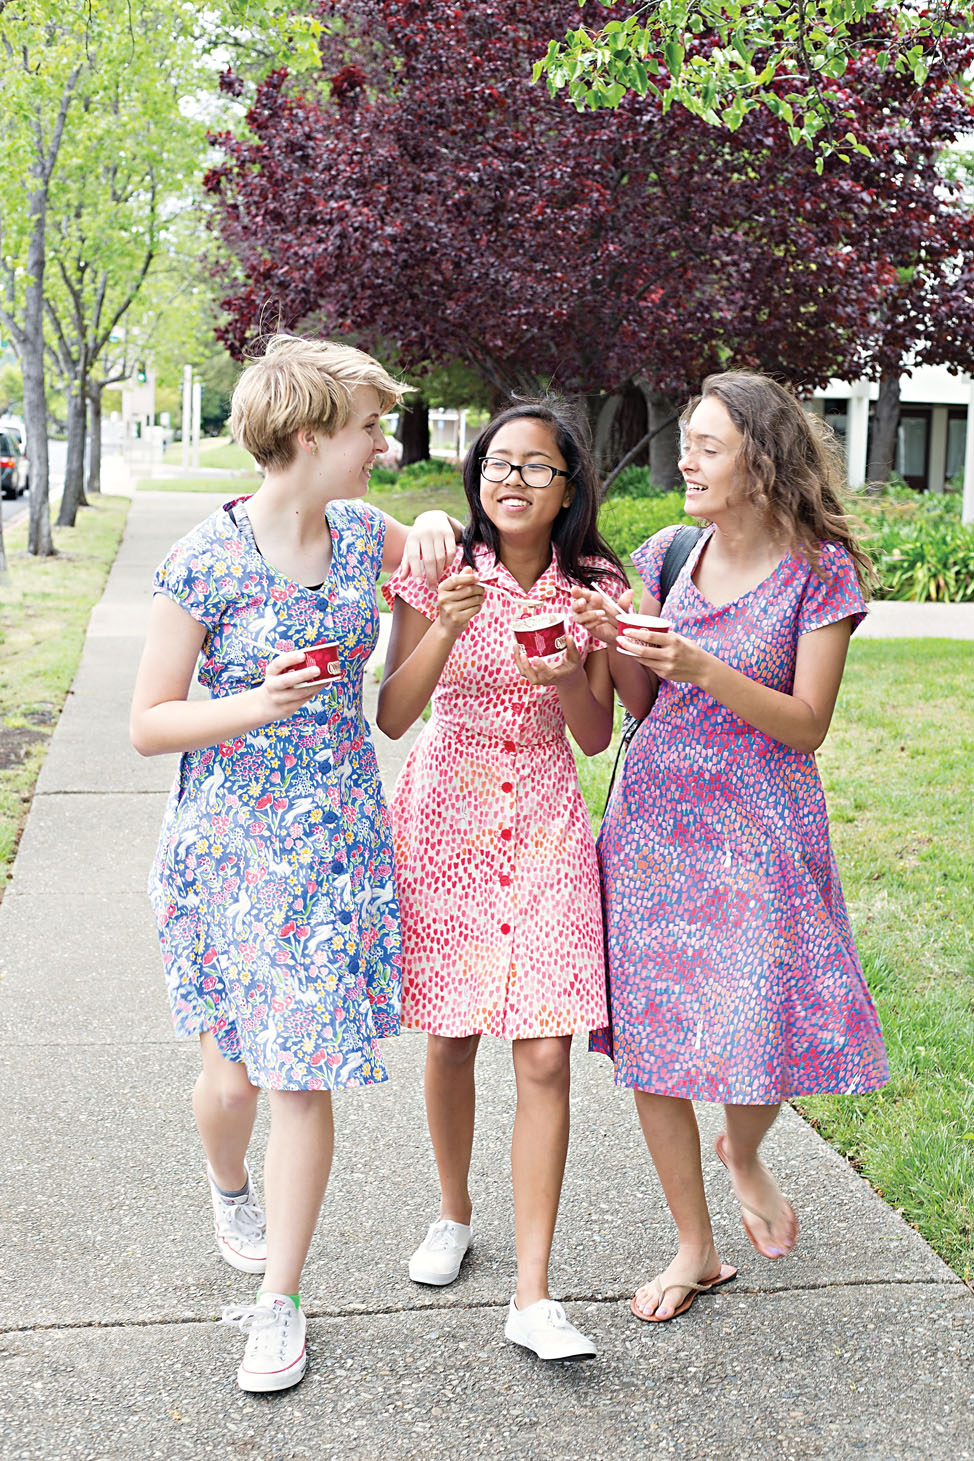
Nicole takes sewers with basic knowledge already through the process of adapting and adjusting commercial sewing patterns. By learning how to make a simple design alterations, she shows how to easily transform your existing patterns by adding or removing collars, pockets, changing neckline shapes or zippers, adding a waistband for a facing, or vice versa. The variations are endless and it includes men’s, women’s, and children’s wear.
The Savvy Seamstress is geared towards sewers with some experience under their belt already. Instead of teaching how to sew the focus is on detailed instructions, combining home sewing tips and tricks with industrial sewing methods giving your handmade wardrobe a designer flair and professional finish.
Neckline Variations from “The Savvy Seamstress”.
Adding a waistband “The Savvy Seamstress”

Adding Pockets from “The Savvy Seamstress”
My Technique Reivew
One chapter in particular go my attention. Bias Binding!
If you look at the patterns I sell online you will notice that yes, I do love a bit of bias binding. I use bias binding in the Gypsy Swing Top, a finish on the facing of the Annie A-line Skirt and also on a pattern that I am working on at the moment, The Sienna Shift Dress.
My partner and I have a running joke at home. He always makes fun of me each time I mention “Bias Binding” because apparently I say it a lot. For example, “Hang on, I’ve just got to add this bias binding” or “I’ll be there soon, I’m just ironing some bias binding” and “In a minute, I’ve got to make some bias binding”. It’s an in house joke here but I thought it appropriate to choose the “Bias Binding” technique to review.
In this chapter of The Savvy Seamstress there are clear photos and step by step instructions on how to attach the binding to the seam allowance edges. I used these techniques to to add bias binding to the ruffle of my Sienna Shift Dress.
The Sienna Shift Dress pattern has the bias pattern piece included however, if you want to cut bias binding yourself the book shows you how to lay out your fabric and cut your binding using a quilting ruler. It doesn’t show you how to press your bias binding as that is a step most sewers with some experience would know how to do and if not you could easily find resources on how to. I like to use a bias-tape maker as mentioned in the book and a great tip that I’ve never known before is to spray laundry starch on the fabric before pressing to stabilize the finished tape which makes it easier to sew.
Another absolutely fantastic tip is to use a tailor’s awl to hold the edge of the tape in position whilst stitching. I’ve never owned or used one in my entire sewing life! Can you believe it? After reading this chapter I bought one for a few bucks and it’s the best thing I’ve purchased in ages. Highly recommend you get one.
There is also a tip on using fusing or fabric glue to secure the binding before edgestitching to keep it in place. I find that a little messy and prefer to just pin and tack but I know sewers who swear by fusing.
I found this chapter very valuable for me. Even though I’ve sewed bias binding many times before I couldn’t believe how easy it was with the tailors awl.
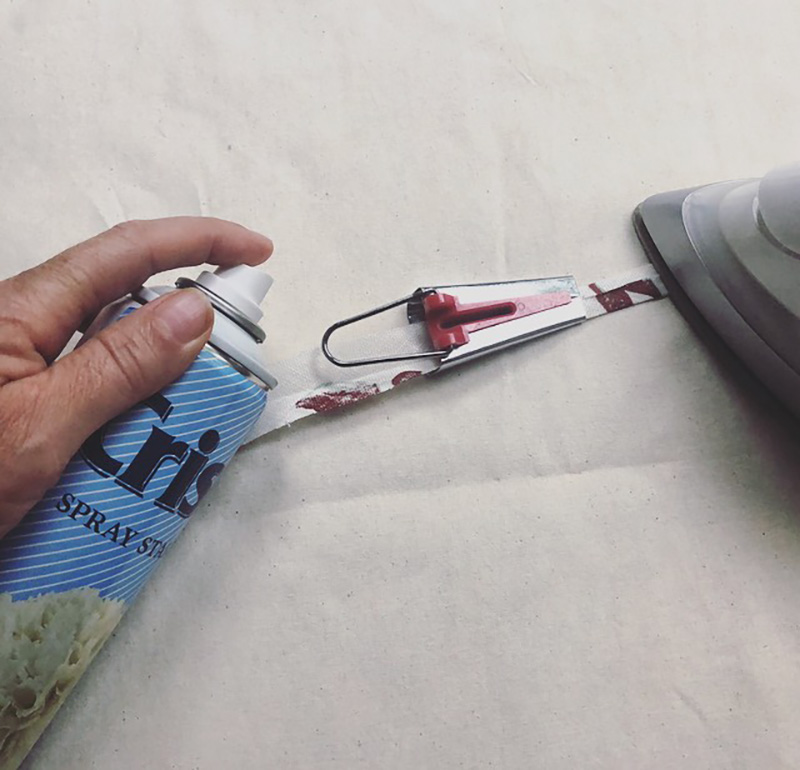
Use Spray Starch to strengthen loose weave or fine fabrics. It worked a treat on this loose weave linen.
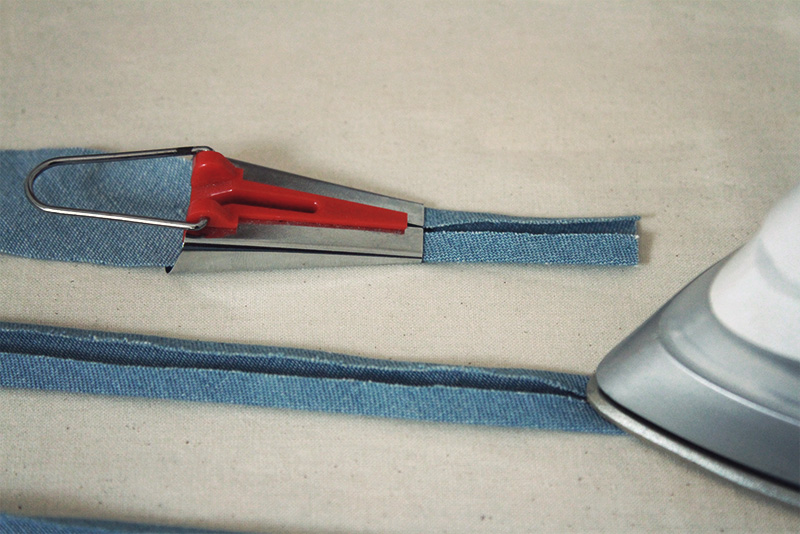
Preparing the bias binding with a bias maker.
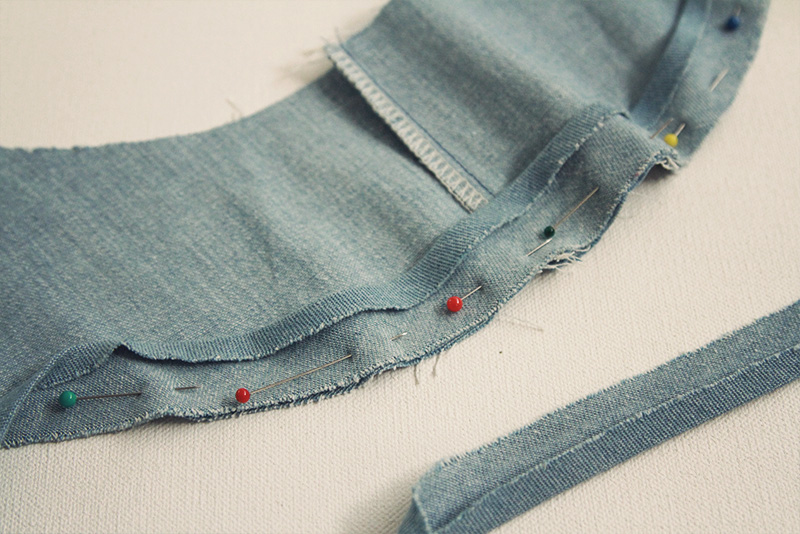
Attaching the binding to the edge of the ruffle.
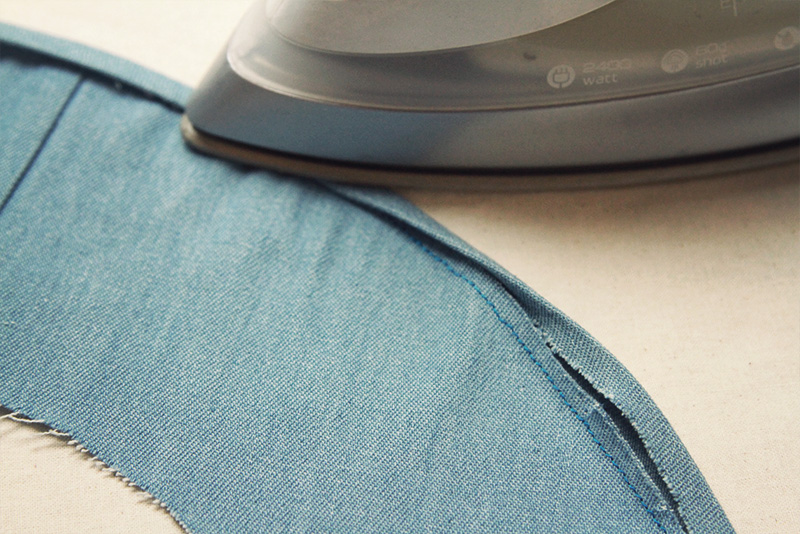
Pressing the folded edge in place. You can also use fusible tape or fabric glue.
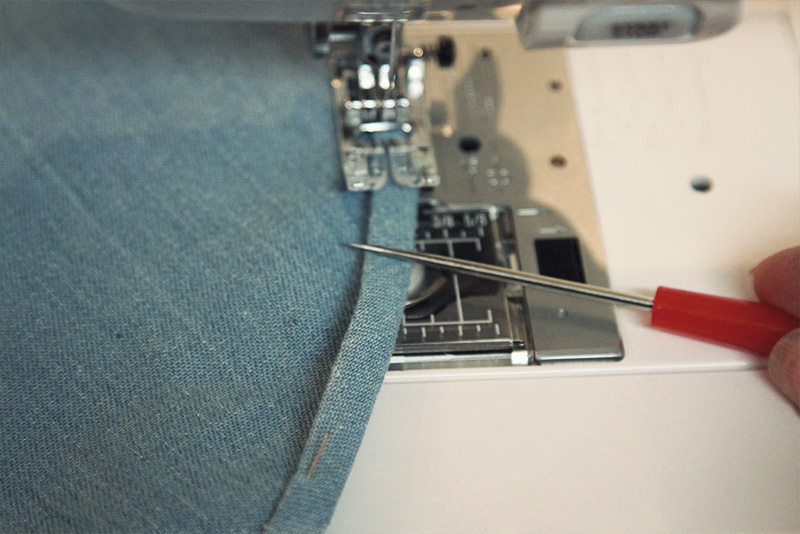
Using my new favorite sewing tool, the tailors awl to hold the binding in place whilst sewing.
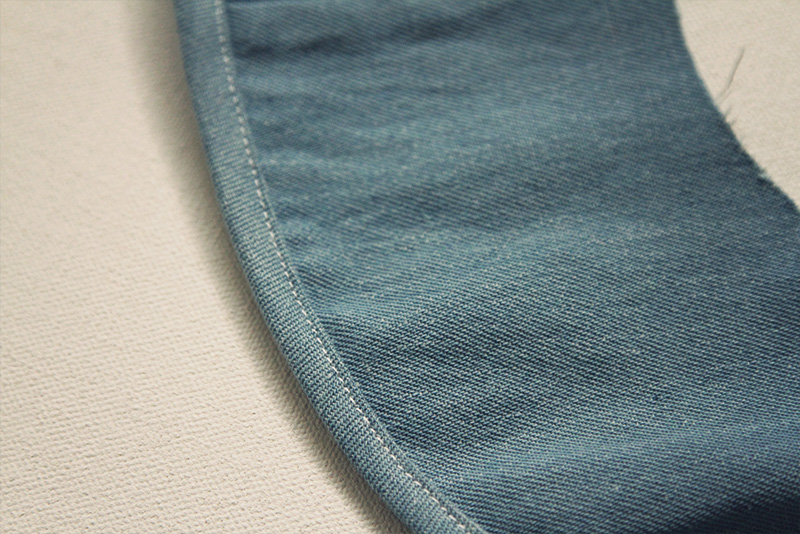
A beautiful edgestitched finish on the bias binding.
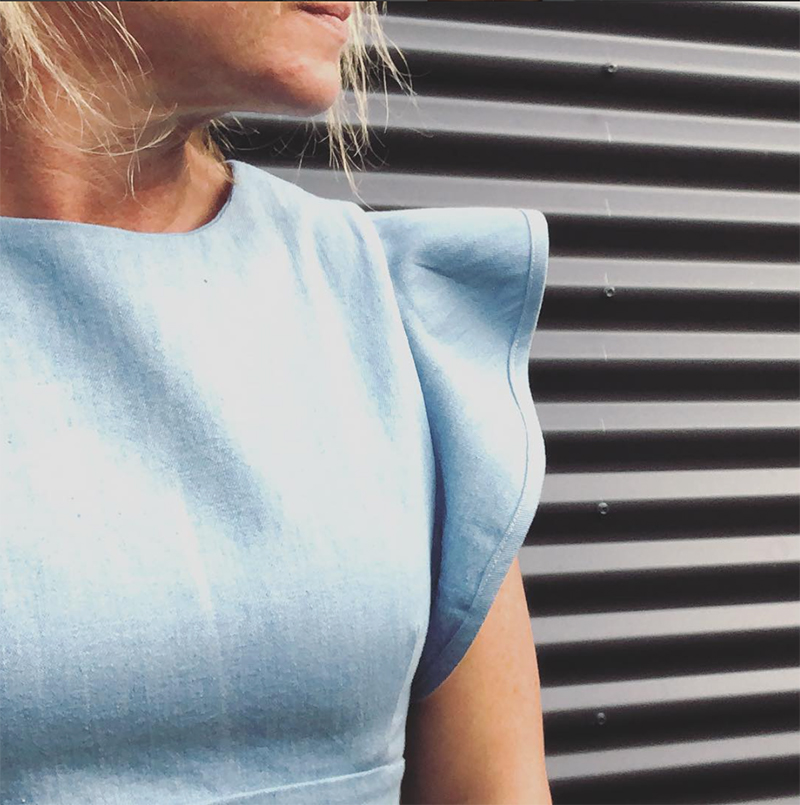 Voila, the finished bodice with binding detail on the ruffle of my Sienna Dress. Thankyou Nicole for your amazing tips.
VERDICT: The Savvy Seamstress is a gem for the intermediate sewer wanting to gain more knowledge in altering their favorite patterns or even just picking up new tips and tricks of the trade to make your sewing more enjoyable and to look more professional. I love the way Nicole combines home sewing knowledge with industrial techniques. There is so much information and advice in this book that is relevant to todays modern sewing skill set, it is an absolute must to add to your sewing book library. “Do yourself a favour” go and get yourself a copy! You can be your own fashion designer!
Give away! Give away! Give away!
At the end of the tour I will be giving away a copy of The Savvy Seamstress along with the other participants in the tour thanks to C&T Publishing and Nicole Mallalieu
Just leave a comment below or on my instagram on any tricks or tips you have up your sleeve for altering patterns or sewing technique. It can be anything! My favorite trick or tip will be emailed and sent a copy of the book at the end of the tour.
All the other bloggers are giving away books too so make sure you check out their reviews with the rest of the The Savvy Seamstress Blog & Instagram Tour.
23rd April – C&T Publishing ctpub.com
24th April – @mrsbeckinsale, cravingsfrocks.blogspot.com
25th April @sewthispattern, sewthispattern.com
26th April @fibresmith
27th April @cookinandcraftin, cookinandcraftin.blogspot.com/
28th April @handmakersfactory
29th April patternreview.com
30th April @usefulbox, usefulbox.com.au
1st May @annewhalley, annewhalley.com
2nd May @thornberrylara, thornberry.wordpress.com
3rd May @yousewgirlpatterns nicolemdesign.blogspot.com
Mary_in_AZ
As a quilter, I have become quite proficient in bias binding. Since I have started back in sewing garments, bias binding is an easy finish. Sometimes, I use the RTW method of sewing the end into one seam. Sometimes, I finish it off like you finish off a quilt binding. I would love to own a copy of this book!
Annie
Hi Mary,
Yes I’ve tried that method too. Great way to sew the binding in the seam.
Thanks
Annie
Vicki Rowe
On wow I constantly struggle with bias binding. Never thought to use laundry starch spray. I’m going looking for some today. Thank you.
Annie
Hi Vicki,
I know, I’d never known this before either. Glad to have passed on some useful tips.
Annie
Angie
Looks like a great book!
Annie
HI Angie,
Yes, it’s really worth a read.
Annie
jaelh
masking tapes leaves no residue on 99.9% of fabrics if it’s only there for a short time. It’s a super easy way to mark the back of pieces with identical front and backs 🙂 (and has saved me… oh… more than once!)
cleta
Great tip but I use tweezers all the time. Love the dress
Annie
Hi Cleta,
Thankyou!
Annie
Ann Marshall
Wow, what a great book to own. Would be most useful in many ways I think.
Annie
Hi Ann
Yes, fantastic book!
Pam
I baste everything first. It makes it easier for me to keep the seams together while sewing and saves money on pins and sewing machine needles which I tend to break.
Annie
Me too! I love basting and yes those pins bend easily. I find I pin myself alot too!
Eve N
I’m a novice sewer, so end up making lots of unwearable muslins. King-sized flat sheets are always deeply discounted which give me 3 yds of 118″ wide (or 6 yds of 59″ if split in half) fabric for about $10. My latest purchase even included 3 yds of “pre-made” bias binding!
Annie
Hi Eve,
That is a great tip! Calico is not as cheap as it used to be years ago.
I must have a look in my local 2 dollar shop.
Annie
Kay
Wow! Can’t wait to read the entire book.
Annie
Yes! It’s a great book.
Regina
This is the best video on cutting miles of bias tape! So grateful to have found it…it’s a game changer!! Enjoy! http://bitesizedbiggie.com/the-unbelievably-fast-way-to-cut-miles-of-bias-tape/
Annie
OMG!! Regina, this is amazing. It is a total game changer for me. Thanks so much for sharing.
Annie
Regina
It’s crazy amazing…it’s something I always struggled with until I found this!
Regina Roza
I use Best Press when working with slippery fabric there’s no residue and it smells great and adds just enough grab to sew easily.
Annie
Thanks Regina,
Great tip. I did find the spray starch I used was a little messy.
Blabla
My first attempt at making bias binding from some cheap linen off my local market was not successful at all! The bias binding was really hard to control but I discovered if I cut it a little wider than normal it fed through my bias maker much successfully and I could use it more easily.
Annie
I’m glad you stuck at it. Cheap linen is not the best test fabric thats for sure!
Mary Nasvik
I’ve had a bias binding tool for years but never used it. I will try it now! Also I want to sew seam pockets.
Annie
Hi Mary,
Yes, you should definitely try it. It’s a great tool.
Annie
Rachel
When cutting slippery rayon or silks use tissue paper to sandwich the fabric as you cut!
Annie
Hi Rachel,
I’m definitely going to try this out next time. Sounds like a tip worth trying!
Annie
Alison Mercieca
When sewing bias cut fabric I cut strips of fusible interfacing and adhere it to the seam allowances to keep the fabric from warping and shifting when sewing. Particularly useful on ‘shifty’ fabrics like chiffon.
Annie
Hi Alison,
Thanks for the great tip. I love it.
Annie
Cheryl Hejlik-Peterson
I have a tailor’s awl, which useful for some tasks, but I also have a fingertip stiletto that I find handy at other times. It slips onto your index finger so you don’t need to hold onto it. I can continue to work with my other fingers to match and smooth fabric as it goes under the needle without continually picking up and putting down the awl.
Annie
Hi Cheryl,
Wow, a fingertip stiletto! I’ve never heard of one of those. Where do you get them from?
Annie
Zoe
If the sewing chalk runs out, use an old soap bar to draw your pattern on the fabric, the first time you wash it the drawing will come right off. Just be careful beacuse some fabrics stain with the soap, so do a test before
Annie
Hi Zoe,
Excellent tip. I have plenty of old soap around. A great recycling tip too.
Annie
Evija
Instead of tailors awl I use tweezers to hold everything in place especially slippery fabric, this way I can get as close to needle as possible it works on sewing machines and also on overlocker so I wouldnt risk my fingers
Annie
Fantastic tip, Thanks Evija.
I’ve got a few sets of tweezers, I’ll give them a go next time.
Annie
Evie Jones
When altering patterns I always pin them to a board to stop them shifting as you move them and add the new tissue. This is a Palmer Pletsch tip!
Annie
OOh, I haven’t heard of this one before. Thanks Evie, Great tip.
Anna
I use some amazing magic tape (which I got from maaidesign) to fuse pockets and curved hems on knits so they don’t need to be pinned. It dissolves away once you wash it. Much smoother than using pins
Annie
Thanks Anna,
Awesome tip. Sewing with knits is quite scary for most people but if you have a few tricks up your sleeve it can be quite rewarding.
Annie
Vanessa Hutchinson
Having my own bodice block pattern has been a revelation! I simply lay it over a commercial pattern to see what adjustments are needed. I have numerous fitting issues and this saves me so much time!
Annie
Hi Vanessa,
So true, fantastic tip for sewers starting out too.
Annie
Sandra
I sew my darts from point to seam rather than from seam to point to make it more accurate. I picked up this tip from Alison Smith on her Craftsy lesson.
Annie
Great tip Sandra,
I love Alison Smith. I’ve done a few of her Craftsy lessons.
Thanks
Annie
Michelle Wellstead
My favourite tip would be always have a magnetic pin tray handy makes life a lot easier when picking up pins that you’ve dropped especially if you have pretty nails.
Annie
Oh yes!! Also, if you’re like me a drop them on the floor all the time. Hubby and kids not happy!!