Follow
  • Facebook
  • Pinterest
  • Instagram
  • Youtube
Sew This Pattern – Online sewing shop
  • STP Sewing Patterns
    • STP Sewing Patterns
    • Sizing Chart
  • Indie Designer Printed Patterns
    • Tilly & The Buttons
    • Closet Core Patterns
    • Paper Cut Patterns
    • Sew Over It
    • Style Arc
  • Fabrics & Notions
    • Cottons / Linens and Blends
    • Georgette
    • Woolens
    • Labels
    • Needles
    • Zippers
    • Interfacings
    • Miscellaneous
  • Sewing School
    • Sewing School
    • Cancellations Policy
    • Sewing School Instructors
    • Sewing School Mailing list
  • Blog by Nine Stitches
  • MENU
  • 0

Fringe Dress

June 10, 2014

Tessuti are running another competition which closes tonight! I bought the fabric a while ago and pinned a few ideas to my pinterest board but like always, left it literally to the last minute (again!).

Update: I was awarded a runner up prize! Thankyou so much Tessuti!

The competition requires that you use Tessuti’s fabric which is a Jersey that comes in black/natural or ecru/natural. Make whatever YOU like! Sew something that suits you and that you’d like to wear. Sounds like a fun project.

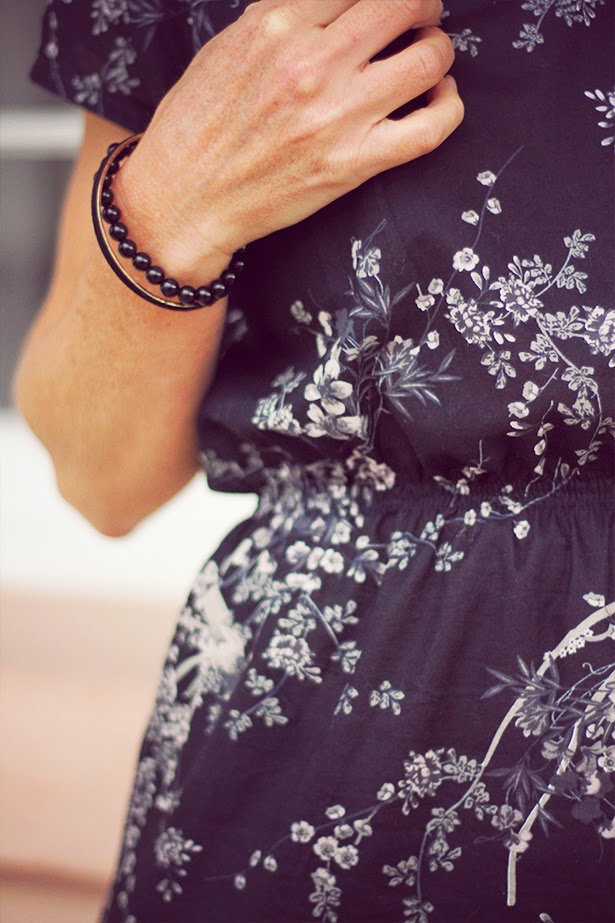
I bought a couple of meters of both colourways but chose ecru/natural for the dress I had in mind. The fabric is beautiful. It is a really nice mid weight jersey which is gorgeous to sew.

robe_dress_02

robe_dress_04

robe_dress_06

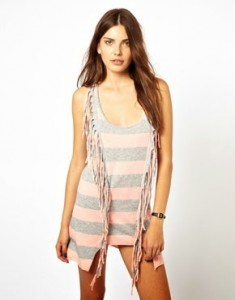
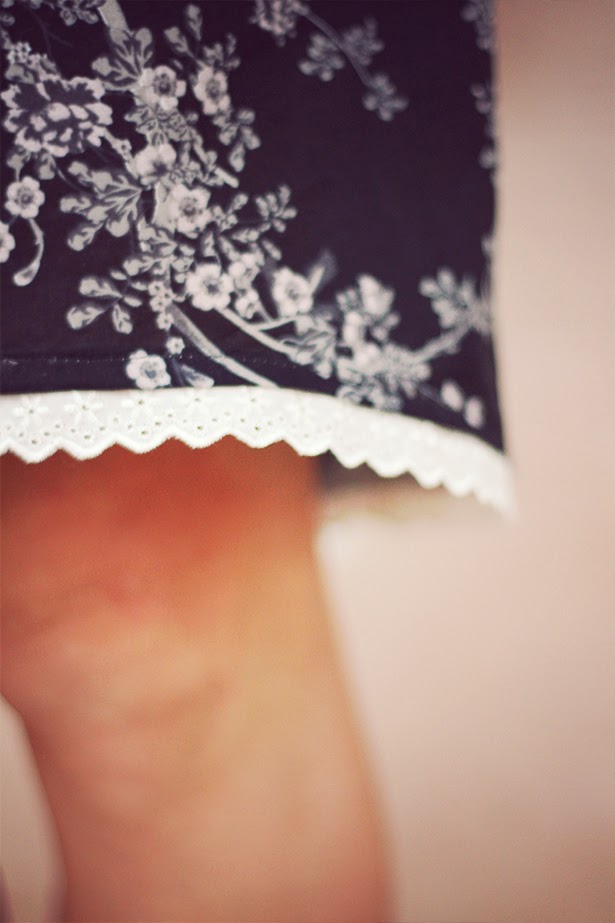
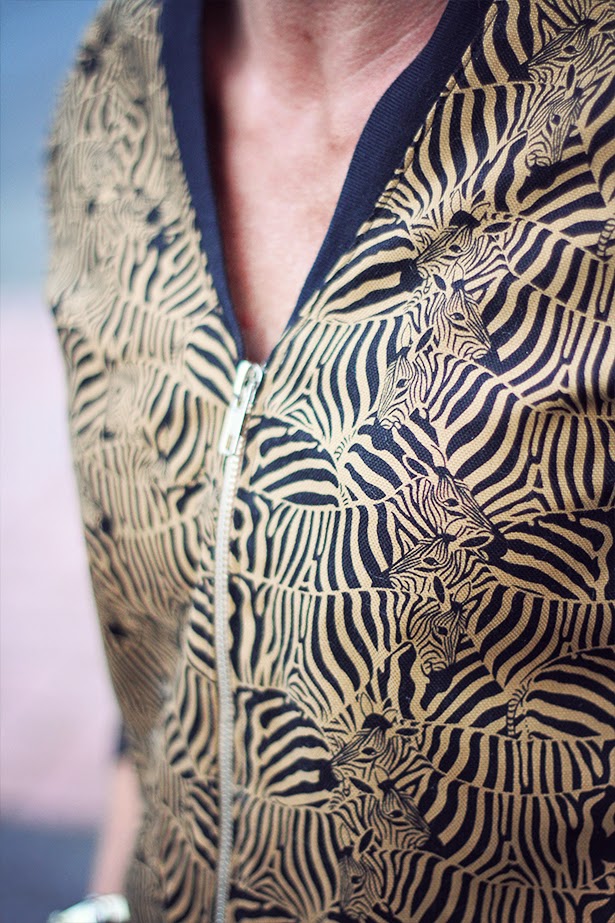
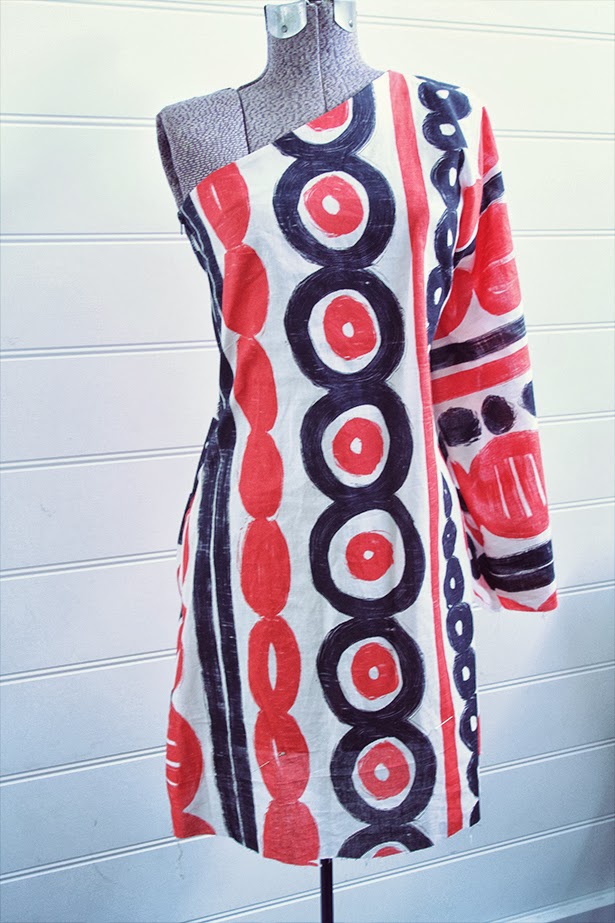
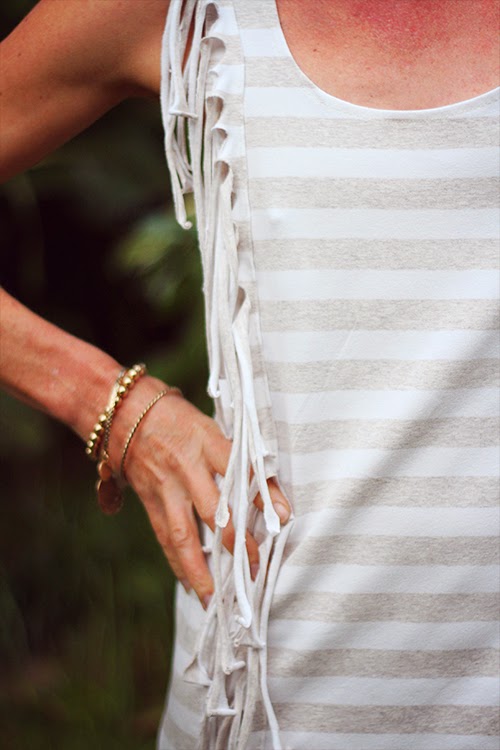
I instantly loved a Sauce dress I found on ASOS which is a simple little dress but is a little edgy with a fringe in the same fabric. It’s such a fun dress and I like to think that I’m a fun girl. I used a Kwik Sew pattern 3777 for the dress which is actually a top so I added a few inches to make a short dress. As I was on holiday’s when I made the dress I didn’t have an overlocker on hand so I used a very narrow zig zag and a stretch needle. I used a twin needle for the hem.

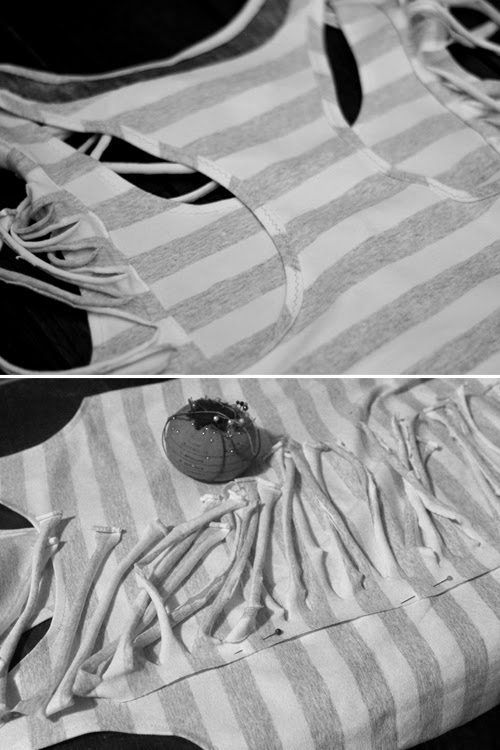
I then made the fringe by cutting a wide strip of the jersey, cutting slits and then pulling it so the fabric curled. It looked just like the Sauce dress so I was pretty happy with that.

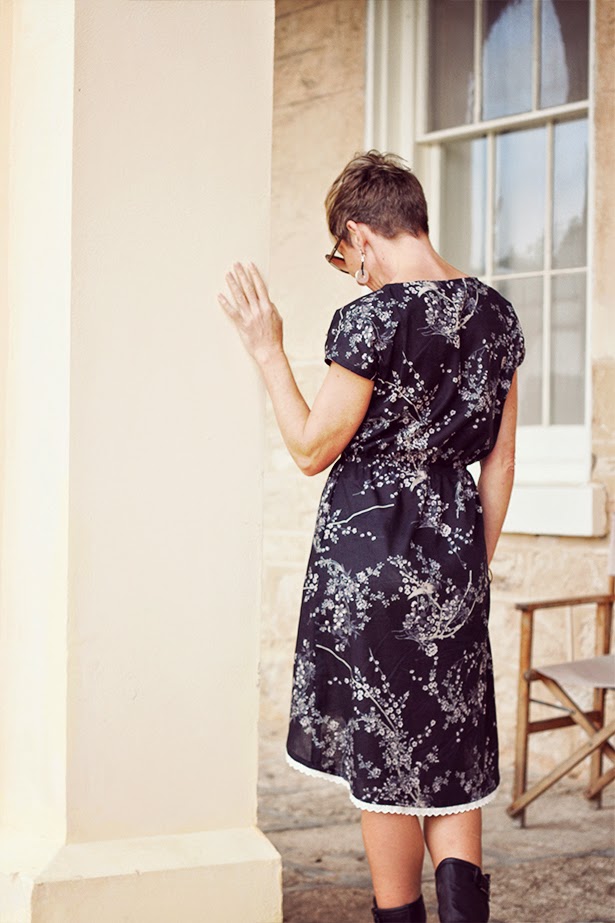
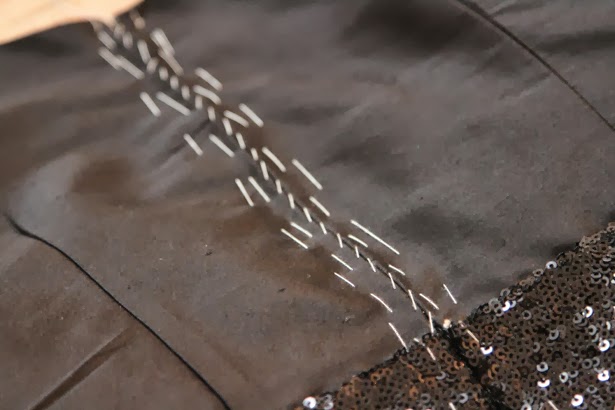
I attached the fringe by hand sewing in place and then top stitching so the fringe faces away from the centre front.

I am really happy with the way it has turned out. I have more fabric so I might try a top next time with the same fringe technique.

robe_dress_05

robe_dress_09

robe_dress_11

robe_dress_12

robe_dress_10


Under Construction

Under Construction

image1xl-235x300

Staple Dress for Perfect Pattern Parcel 3

June 7, 2014

This little number is part of a fun project called Perfect Pattern Parcel.

I was kindly asked if I would participate and how could I say no as it supports Indy designers and raises funds for children’s education. Win Win!

I chose the Staple dress because it looked more my style than any of the other patterns. I chose the “mullet” hem rather than the straight hem as I think it adds a little more interest to the dress. The dress is super easy to sew and very quick to sew as well. I whipped it up in an afternoon. I can’t even remember where I found the fabric but I think it was a Spotlight bargain and is a Japanese cotton voile. Perfect weight for this type of dress.

The photos were taken this weekend in Robe, South Australia. We are here on a holiday as it is a long weekend in Australia (celebrating the Queens birthday). Robe is full of history and a perfect location for a photo shoot.

staple_robe_02

staple_robe_03

staple_robe_04

staple_robe_05

The dress has a shirred waistline. I added three rows of stitching. This is easy so don’t be afraid. The pattern has great photos included so you can’t go wrong. I also added a bit of broderie anglaise lace to the hemline as I thought it needed a bit of something special.

staple_robe_06

staple_robe_07

staple_robe_08

staple_robe_09

staple_robe_10

I hope you can support this project and enjoy your sewing.

Here is a little background from Perfect Pattern Parcel:

Here at Perfect Pattern Parcel, we believe in supporting independent pattern designers. It’s our opinion that indie patterns are just, well, better than big box patterns, and we’re pretty sure our customers think so too. So, we allow customers to show their support in naming their own price for each Parcel. We also encourage customers to allocate part of their Parcel price to the charity Donorschoose.org in order to help classrooms in need. Pattern Parcel donates all profits after expenses from Parcel sales to the charity as well. Together we’ve raised almost $4,500 towards eliminating educational inequality.
The Pattern Parcel Number 3 includes

Poppy Tunic by Make it Perfect
Water Bottle Tote by Radiant Home Studio
Jorna Tank Dress by Jenna Brand
Staple Dress by April Rhodes
Bombshell Swimsuit by Closet Case Files
Bonus Pattern: Choose a price of $28 or greater for Parcel #3 and you will automatically also be sent the Bonus Pattern! The Bonus Pattern for this Parcel is Prefontaine Shorts for Women by Made with Moxie. This shorts pattern has a retro trim, loads of pockets, two inseams and are so comfortable you won’t want to take them off. Includes sizes 0 – 24. Exclusive launch on Pattern Parcel. Be the first to own this pattern!

Pattern Parcel Number 3

233-FB

Zebra Harem Bomber Jacket

April 21, 2014

This jacket was inspired by the stylish version of Sophie at Cirque Du Bebe’s bomber jacket. After seeing Sophie’s gorgeous version of the bomber I thought I’d better sew myself one.

Bomber-jacket_2


Bomber-jacket_1


Bomber-jacket_5


Bomber-jacket_7


The fabric is from the Fabric Store in Fitzroy. I don’t shop there often because it’s on the other side of town but worth the trip as the shop has some really nice fabrics. This fabric is a print with lots of little zebras. I’m not sure of the composition exactly but it’s a medium weight woven with a little bit of elastane in it. I only bought 1 meter thinking that I would make a little skirt but as usual it was folded away and forgotten about until I started thinking about the bomber. I thought it would pretty funky in a bomber.

The pattern is from Burdastyle Magazine Feb 2013. They call it a “blouson jacket” which sounds more posh than a bomber. The pattern requires exactly 1 meter of fabric so it’s perfect for any off cuts you might have. It’s also lined so I bought a satin lining in a gold colour to add a bit of glamour to my zebra’s.

Bomber-jacket_9


Bomber-jacket_10


When I first looked at the pattern I thought this will be quick and easy but it was probably a little bit more involved than I thought when it came to the lining. Not that it was difficult but definitely hard to understand the directions in the magazine so if you don’t have a lot of experience following patterns or sewing it might prove to be challenging.

I chose a metal open end zip as I think this adds a bit more style than just the plastic zips. I’m really happy with this jacket and I’m sure I’ll get plenty of wear out of it now it’s cooling off here in Melbourne. Easy to slip on over a tee with some jeans or even dress it up with a nice dress underneath.

Bomber-jacket_12


Bomber-jacket_13

Recommend the pattern but for intermediate sewers.

Dragonfly Fantasia

March 16, 2014

Finally I am back to my sewing after a long hiatus. After the enormous amount of sewing I did for the School fete I needed a break. I had developed a really bad back from sitting at the sewing machine for hours on end and basically couldn’t even look at my sewing machine without my back starting to moan.

For the past few weeks I have been tidying up my fabrics and perusing fashion mags which ignited a little spark that I had left somewhere.

We went to my in laws for a weekend so I packed up the sewing bag with some fabric from Tessuti and a pattern that looked fairly easy. I thought I would gently ease my way back into it.

The fabric is a gorgeous Italian digital printed ponti knit called “Dragonfly Fantasia” and the Pattern is Butterick 5559. The Pattern is a close fitting pullover dress with front and back darts and outside stitched tucks. The tucks conceal the darts and have beautiful sweeping lines meeting at the side seams.

Once I laid the fabric out and started cutting I was away again, thoroughly enjoying the creative process.

A few things about the pattern. Make sure you thread trace all lines. Even though it is labelled as an easy pattern to sew (which it is) you must be very careful in tracing all of the lines. It took me at least an hour to do this but it was well worth it in the end and I have to say I actually enjoy thread tracing. I get a lot of satisfaction out of having perfect lines.

The fabric required size 90 stretch needles as I found out from a lot of frustrating attempts on scrap fabric. If you don’t sew with stretch needles on ponti fabric you will most likely get skipped stitches. I tried ball point first as this is what I have used in the past but they didn’t work this time. I think because this fabric has elastane in it. Just make sure you test on scrap fabric first.

The tucks are very easy to sew just make sure you tack first and not just rely on pinning. If you tack its very easy to keep nice straight even lines of sewing. If you just pin the fabric will most likely move while you are sewing resulting in uneven tucks.

I had to shave off about 1 cm from under the arm as the armhole was sitting to high under my armpit. I find this with a lot of patterns. Does anyone else seem to have this problem or do I just have low armpits?

The dress is very short. I am a petite 157cm and only turned up the hem about 2cm. If you were any taller I would suggest adding more hem allowance.

Once the tucks were sewn and lined up almost perfectly the dress was basically done. Just the side seams and hem and it was ready to wear.

The photo’s were taken over the weekend at our friends “tree house” near Flinders beach. They have the most beautiful holiday house set in amongst a forest of pine trees making it the perfect setting for my dragonfly fantasia to debut.

This is a close up of the fabric which has dragonfly’s, strange fairy creatures and flowers which border the hem.

I highly recommend the pattern and the fabric. Butterick 5559

St Kilda Primary School Fete

October 28, 2013

Our School St Kilda Primary held its Fete on Sunday and what an amazing day it was. We have a number of celebrity parents and some very dedicated parents which make it one of the best fetes around.

There was Rockwiz for kids hosted by Brian Nankervis. A comedy room with acts from Rhys Muldoon, Bev Killik, Colin Lane and Greg Fleet. A talent show “So you think you can do stuff” and Live music including Joe Camilleri. Rides, Beauty Parlour, Art & Craft, Dunking Machine, Show Bags, Yummy food, the list goes on.

I was part of the Craft Mama stall and want to share some pics from the day.
Thank you to all the ladies especially Annie Stanford for helping with sewing, cutting, ironing and sharing a cuppa with me.

lavender-bags07

fete1

Felted and knitted animals made by Saffron and Carolyn

Dolls and Owls

Dolls and Owls

fete-purchase

Beautiful Lavender Bags

fete-knitted-dolls

fete-dolls2

Dolls now named “Annie dolls”. Made by Annie S and Annie M. These were made using a free pattern from Seventy Piggies

annies06

It was such a fantastic day and the kids had a ball. I have to say I am exhausted and am looking forward to putting my feet up for a while!
annie x

Signature Style for Project Sewn

October 21, 2013

This is the final week for the sew along at Project Sewn. The challenge this week is to create your “signature style”. I have been just far too busy this week to create something new as our School Fete is on this Sunday and I am heading up the Craft Mama’s so every waking hour has been dedicated to that. My back is killing me!!
I am a little disappointed I couldn’t come up with something new for this but I have the perfect dress to enter anyway. I designed this for the Tessuti Awards just a couple of months ago.

It is so me. A little crazy, alot of fun and very vibrant!

I hope you like it. You can read more about the making of it here

Please vote in the Project Sewn challenge here if you like it. I’m dress number 9.
(Voting starts on Friday 25th of October).


red_16

red_15
red_11

red_9

red_5

red_3

red_2

red_1

I heart St Kilda dress

October 16, 2013

It’s week number three in Project Sewn’s sew along competition. This week the theme is “graphic print challenge”. Before I go on you can vote here from Friday October 18th until Sunday October 21st (give or take depending on which country you live in).

I had plenty of graphic prints in my stash because I love prints. I tossed up between a few but finally settled on a fabric I picked up from a little fabric shop in Brunswick. It’s just your basic cotton poplin and cheap at $5 per meter. It was one of those kind of purchases where you get home and say to yourself “what the heck was I thinking” and “what on earth am I going to do with that!”. So needless to say it’s been hanging around for a while. However, when I pulled it out I immediately thought it would be a perfect fabric for a graphic challenge as it is so strong and bold.

I did a bit of research and found a great little asymmetric design with a batwing sleeve and in a mini length. I think with such a bold print having as little dress as possible is a must.

I was a bit naughty and purchased a new pattern, although it was on sale for $5! Bargain. It’s Burda 7225 which is a “young” pattern. I thought this wouldn’t matter but I had lots of problems with the fit so perhaps this is why.

The idea was to use the pattern for the main body design and to draft a batwing sleeve. It all seemed to go well with the drafting so I just cut it out without sewing up a muslin first. Big mistake! I should know better but I was under the pump for time. It’s funny because I thought having such and easy pattern would mean I could sew it up really quickly and being such an experienced sewist (not) I could just whip it up no problem. All the basics went out the window. I didn’t fit it, I didn’t mark it properly I just went ahead like a bull at a gate.

5


4

Once I sewed the sleeve up I decided to try it on. OMG. It looked awful. The sleeve just didn’t work at all! It needed to be more batwing and it was totally the wrong fabric. I decided to cut the sleeve out and go back to the original pattern. After sewing it up and trying it on again I found the armhole too small which I often find with patterns. Maybe I’ve got really low set armpits! I unpicked again and re sewed the armhole. Much better this time. Finally I added the bow as per the pattern using a pin that I can detach if I decide I don’t like the bow.

3

2

Finally, I have finished and I’m pretty happy with it now but for such a simple design it turned out to be a real pain in the butt!

I took a pic of how it looked after I sewed the batwing sleeve in. You can see how ugly it looked. Didn’t work at all!!

1

Craft Mama’s

October 8, 2013

My Son’s School, St Kilda Primary is having it’s fete on October 27th this year. I put my hand up to organise the sewing bees for Craft Mama’s which is a group of mum’s who sew and knit for the fete.

I have had two sewing bees so far and having a third this week. It was so much fun, I just thought I’d share a few pics from our first sewing bee.
We ate cake, chit chatted and got a bit of sewing done. Once we have completed everything I’ll post more of the crafty stuff we have come up with.

I have a board on pinterest where I have been collecting ideas.

school-fet-3

school-fete-1

school-fete-2

school-fete-4


If you live in the Melbourne area, try to get down to our fete as it is huge! We have lots of celebrity parents who are performing. “House Husbands” favourite Rhys Muldoon, disgracefully funny mother of 5 Fiona O’loughlin, comedian Greg Fleet and the relentlessly hilarious Bev Killick will be performing just to name a few. There will be rides, talent shows, vintage clothing, craft mama’s goods, lolly stands, the list goes on. It’s a great day out!


school-fete-5

school-fete7

school-fete6

LBD – Project Sewn Sewalong

October 2, 2013
Project Sewn is a 4 week sewing competition comprising six designer/sewists who are all given a theme each week to base their looks on.  They are then scored by their fellow competitors and are opened to an online popular vote.  At the end of the voting period the votes are tallied and based on this combined score. One designer is sent home and one is announced a winner for each week.
Along with the “professional” competition there is also a little sewalong for anyone to enter based on the same theme the designers have each week.
I’m definitely going to sew along with this one. I need to use a lot of my stash so I’m making a personal vow to myself to only use fabric and supplies that I have on hand already and to sew along each week not just enter something I’ve already sewn. Update: Broken vow in Week 2. Entered something I made up last month as my mum is in town and I need to spend some QT with here.

Week number one is the LBD. The little black dress is an essential part of any woman’s wardrobe and guess what? I didn’t have one! 
I was pretty happy when I sorted through my stash box and found the following:

Black Silk Shantung which I picked up from Lincraft. I remember it was a little pricey so I’m glad I’m finally using it.
Black lining and a 20cm of a black sequin fabric (no idea why I bought this)
Pattern V8555 I picked up when Spotlight had one of those $5 pattern deals on. I thought it looked like a nice staple pattern to have in my collection.
Black zip. 

Wow, I had everything. No need to take a trip to the fabric store which is great as I would end up coming home with another purchase which has nothing to do with the LBD challenge.


The pattern is V8555 which I checked out on Pattern review. They all looked amazing and had great reviews so definitely worth sewing up.

The Silk shantung creases easily and I had it folded for a while in a box so I had a lot of pressing to do before I started. Also worth noting is that it frays a lot. I decided to use a black sequin fabric for the midriff section which adds a nice sparkle and bit of glamor but it was very bulky and slippery. I made sure I tacked everything in place before sewing and it worked really well. I trimmed back the seams a lot to reduce the bulk. 


I really liked sewing this pattern, it was easy and fits well. I didn’t realise that a normal dress zipper was to be inserted and had sewn the CB seam already before reading this instruction.  I didn’t want to ruin the look of the dress by machine stitching the dress zip in so I used the couture method of stab stitching. This requires lots of tacking in place first. But, I’m so glad I did as it turned out beautifully. I will definitely use this method again. You can really manoeuvre the zipper so it fits perfectly.
What I really love about this LBD is that it reminds me of those gorgeous 50’s style dresses like Audrey Hepburn used to wear. All I need now are some long gloves and pearls. Actually, you might notice I’m wearing pearls. They are a little present my 8 year old son gave to me for mothers day. He bought them from his School for $1! He is always asking why I don’t wear them, so now I can show him that I think they are special enough to wear with my special dress.

           Now I have a little black dress in my wardrobe and I’ve used a fair chunk of my stash,                                                                             thankyou ProjectSewn.

    To reinforce the seam with the slit I made seam binding out of the 
silk shantung 

 I used the couture method of stab stitching for the zipper which
 required three rows of tacking

 The midriff was challenging as I had four layers of fabric, lining,
interfacing, sequin fabric and main fabric.


You can vote here form my dress in the competition. I am number 12.
Thanks!


← Older posts
Newer posts →

Useful

  • Frequently Asked Questions
  • How to Print and Assemble a PDF Pattern
  • Sizing Chart
  • Terms and Conditions
  • Cancellations Policy
  • Privacy Policy
  • COVIDSafe Plan
  • Contact

Recent Posts

  • Hack the Sage Smock into a Bow-Front Dress September 15, 2025
  • Sewing Machines. Which one is best for a beginner? October 23, 2023
  • Find your Sewjo February 28, 2023
Sew This Pattern is about getting creative and making exciting clothes that will show off unique style and personality. Not only will you get excited about sewing your own clothes but also actually wearing your own DIY fashion!

Subscribe for pattern news and updates!
Payment methods
© Sew This Pattern - Indie Pattern Designer
  • STP Sewing Patterns
    • STP Sewing Patterns
    • Sizing Chart
  • Indie Designer Printed Patterns
    • Tilly & The Buttons
    • Closet Core Patterns
    • Paper Cut Patterns
    • Sew Over It
    • Style Arc
  • Fabrics & Notions
    • Cottons / Linens and Blends
    • Georgette
    • Woolens
    • Labels
    • Needles
    • Zippers
    • Interfacings
    • Miscellaneous
  • Sewing School
    • Sewing School
    • Cancellations Policy
    • Sewing School Instructors
    • Sewing School Mailing list
  • Blog by Nine Stitches
  • Facebook
  • Pinterest
  • Instagram
  • Youtube

Cart

Sew This Pattern – Online sewing shop
  • STP Sewing Patterns
    • STP Sewing Patterns
    • Sizing Chart
  • Indie Designer Printed Patterns
    • Tilly & The Buttons
    • Closet Core Patterns
    • Paper Cut Patterns
    • Sew Over It
    • Style Arc
  • Fabrics & Notions
    • Cottons / Linens and Blends
    • Georgette
    • Woolens
    • Labels
    • Needles
    • Zippers
    • Interfacings
    • Miscellaneous
  • Sewing School
    • Sewing School
    • Cancellations Policy
    • Sewing School Instructors
    • Sewing School Mailing list
  • Blog by Nine Stitches
  • 0
Sew This Pattern – Online sewing shop
Verified by MonsterInsights